Post to Instagram Automatically: Setup, Tokens and Fixes
Published on
Tags:
Your publishing script works against the test account. Then a customer connects Instagram, the container request succeeds, and nothing appears on their profile. The queue keeps retrying while you're trying to work out whether the problem is the token, the file, or the account.
To post to Instagram automatically, you need more than a scheduled API call. You need a worker that distinguishes waiting from failure, preserves enough state to investigate an ambiguous response, and stops retrying when only the account owner can fix the problem.
Table of Contents
What Your Instagram Account Needs Before Automation
A script that works in testing hasn't proved that a customer's account is ready. Check eligibility and authorization before debugging the request body.
Meta's Instagram Platform documentation supports content publishing for Instagram Professional accounts, Business or Creator, rather than ordinary personal accounts under the documented Facebook Login route. It also describes narrower Stories availability, limited to Business accounts under that login path. Don't assume that support for feed publishing proves that your planned Stories workflow is supported.
Run the preflight checks in order
Account type: Confirm that the customer connected a supported professional account. Retrying a personal-account integration won't change its eligibility.
Publishing grant: Check the permissions granted through OAuth, not just the permissions your application requested. A missing publishing grant requires authorization, not another identical request.
Page authorization: For a setup involving a connected Page, check whether Page Publishing Authorization applies. Don't impose Page requirements from one login configuration on another.
Media access: Ensure that the supplied media URL retrieves the file without an application session, login screen, or private-network dependency.
Format eligibility: Confirm that the intended publication type is supported by the selected login path before exposing it in your composer.
Meta's Content Publishing guide documents public media retrieval and warns that Page Publishing Authorization must be completed when required. That distinction matters: a valid token isn't proof that every authorization condition has been satisfied.
Preflight rule: Validate what the connected account can publish before accepting a scheduled job.
Make this a quick account audit. Check the account type in Instagram, confirm the connected Page where your configuration uses one, and open the media URL in a private browser window.
The browser test is a useful first check, not a guarantee that every subsequent fetch will succeed. Your application should still preserve the URL and the platform's error response so you can distinguish an inaccessible asset from an authorization failure.
How to Connect Your Account and Keep Tokens Alive
The app works, then calls start returning OAuthException. Token expiry is a strong suspect, but the exception alone isn't a diagnosis. Identify the login flow and inspect the error payload before changing your refresh logic.
For Instagram API with Instagram Login, Meta's getting-started documentation describes business-login tokens valid for 1 hour and long-lived App Dashboard tokens valid for 60 days. The same documentation allows refresh of a valid long-lived token once it's at least 24 hours old, provided the required Instagram business permission remains granted; an expired token can't be refreshed.
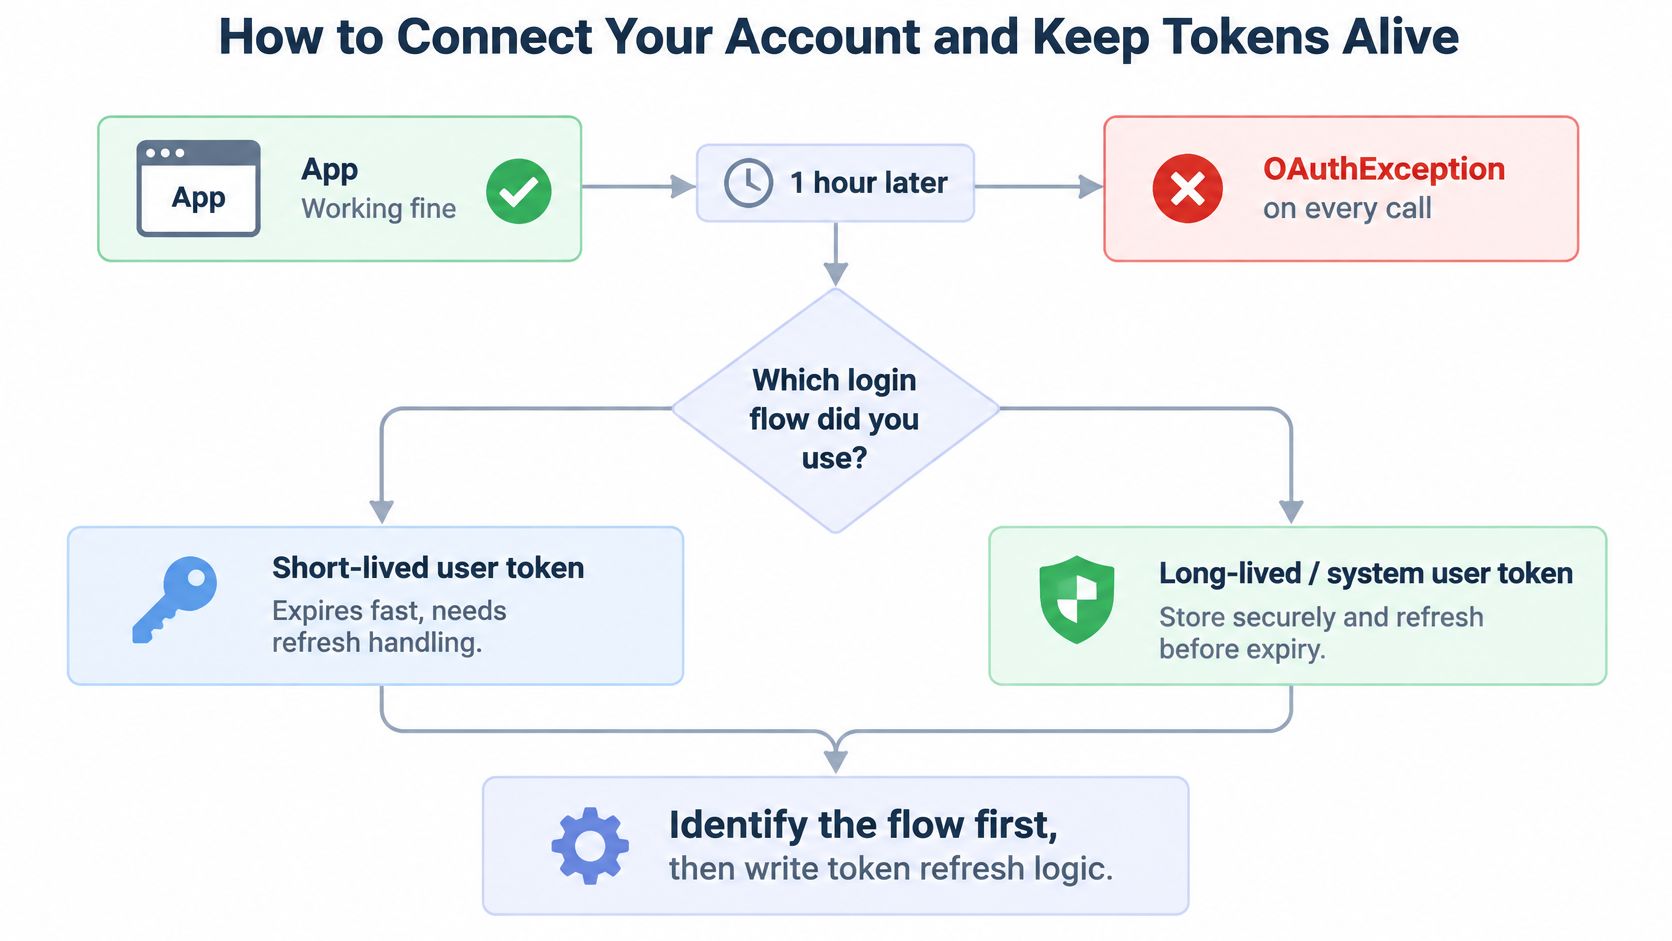 A flowchart explaining how to handle authentication tokens and fix OAuthException errors for application connections.
Build the connection flow before the scheduler
Create the developer application. Add the Instagram product and select the login configuration you'll deploy. Keep its authorization requirements separate from other Meta login configurations.
Configure the OAuth redirect URI and publishing permissions. Treat the granted permissions as connection state. Don't infer them from a successful login.
Send the user through authorization. Capture the authorization code through your configured callback rather than asking users to copy tokens into your application.
Exchange the code and persist credentials. Store the token securely alongside its expiry, the Instagram account ID, and the selected login flow. Your worker needs that metadata to decide whether a connection is usable.
Obtain the appropriate long-lived token. Follow the documented App Dashboard or exchange procedure for your selected configuration. Don't assume a token becomes long-lived merely because you stored it in production.
Check refresh eligibility before publishing. Refresh eligible long-lived credentials before jobs depend on them, rather than waiting for a publish request to expose expiry.
Provide a reconnect path. When credentials are revoked, expired, or otherwise invalid, pause affected publishing jobs and tell the owner what action is required.
Separate refresh failures from reconnect conditions
A temporary failure while contacting the token endpoint deserves different handling from a response saying the credentials are no longer valid. Keep the original error and classify it before deciding what happens next.
I'd run credential maintenance independently of the publishing worker, with a final credential check when a job starts. That avoids making every scheduled publication responsible for discovering a neglected connection.
The OAuth token management guide is useful when designing that lifecycle. The important boundary is operational: retry a temporary request failure, but reconnect an invalid account connection.
Also, don't treat the infographic's system-user label as an interchangeable Instagram credential type. Your implementation must follow the token type and refresh procedure documented for its actual login configuration.
Media Specs That Stop Posts Failing Silently
Validate media when the user schedules it, not when the publication is already due. A rejected upload can produce a clear correction request; a processing failure discovered later needs an alert, an investigation, and possibly a missed publishing window.
The following Instagram image and video specifications come from Meta's media-container reference. Use the specification for the media type you're creating rather than applying these video values indiscriminately to every publication format.
Format | Requirement | Documented Value |
Image | File type | JPEG only |
Image | Maximum file size | 8 MB |
Image | Color space | sRGB |
Image | Width | 320 to 1,440 pixels |
Image | Aspect ratio | 4:5 to 1.91:1 |
Video | Container | MOV or MP4 |
Video | Encoding | H.264 or HEVC, progressive scan, closed GOP, 4:2:0 chroma subsampling |
Video | Frame rate | 23 to 60 FPS |
Video | Maximum bitrate | 25 Mbps |
Video | Audio | AAC up to 48 kHz |
Video | Maximum file size | 300 MB |
Video | Duration | 3 seconds minimum to 15 minutes maximum |
Video | Recommended presentation | 9:16 |
Prepare the asset before creating a container
Receive or download the original. Preserve enough information to trace the processed asset back to its source.
Inspect the actual file. Verify its content type and byte size. Don't rely only on the filename extension.
Normalize images. Convert the color space and dimensions to the documented image requirements.
Transcode video deliberately. Produce a compliant MP4 profile with the supported video encoding, progressive scan, chroma subsampling, and AAC audio.
Upload to durable public storage. Use a URL whose availability covers processing and publication, not merely the moment the scheduling request arrives.
For video-specific preparation, the Instagram Reels format guide provides a focused companion checklist.
Watch for local URLs, signed URLs that expire during processing, unsupported JPEG variants, missing audio atoms, inconsistent codecs, and mismatched carousel dimensions. Treat these as validation or investigation targets, not reasons to keep resending the same asset.
A retry doesn't transcode a file or make a private URL public.
Track validation-pass rate, container-processing failure rate, publish-success rate, and duplicate-publication rate separately. Those measurements tell you whether users are submitting invalid assets, processing is failing after acceptance, or your worker is mishandling delivery.
Keep validation errors actionable. “Convert this image to JPEG” gives someone a next step; “media failed” leaves them guessing.
How to Publish Through the Container Cycle
Instagram publication follows a create, wait, publish sequence. A successful container-creation response means you have a container to track, not proof that the post is ready or live.
Meta's media-container documentation defines the status_code states used to follow processing, including EXPIRED when a container hasn't been published within 24 hours. For video, check processing status rather than immediately attempting publication.
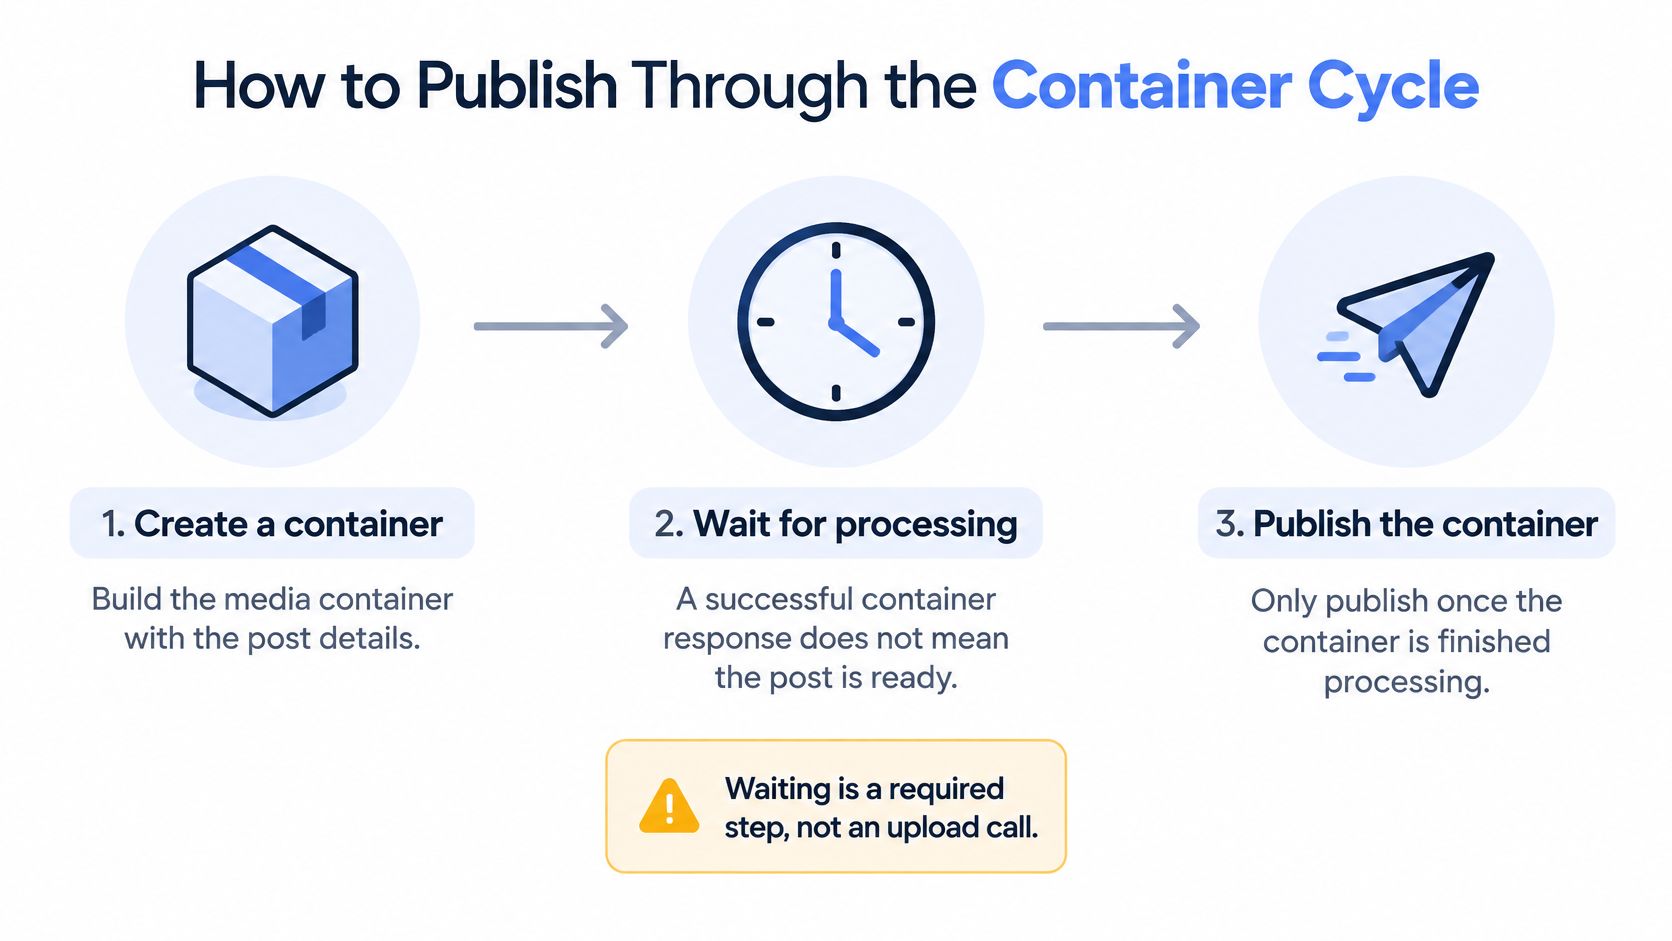 A three-step infographic showing how to publish a container for Instagram posts including processing times.
Persist each transition
Create the media container. Supply the public
image_urlorvideo_urlappropriate to the media. For a carousel, create the child containers before creating the parent that references them.Store the returned container ID. Associate it with your internal job and target account before advancing the workflow.
Read
status_code. Keep processing separate from publication. For video, wait forFINISHEDbefore proceeding.Publish the container. Pass its ID to the media-publish endpoint only when it's ready.
Record the confirmed outcome. Save the platform post ID and retrieve or store its permalink. Don't label a job successful merely because container creation succeeded.
Replace an expired container. Treat the old container as terminal; create a new one for a deliberate replacement attempt.
Use the following container status values and what to do as worker transitions, not just strings displayed in a dashboard.
Status | Meaning | What Your Worker Does |
| Instagram is still processing the media | Keep polling; do not publish yet |
| The media is ready to publish | Call the media-publish endpoint |
| Processing failed | Stop, record the error and check the media URL and format |
| The post is live | Store the platform post ID and permalink |
| Not published within 24 hours | Create a new container; do not retry this one |
Give polling an application deadline
IN_PROGRESS isn't a processing failure. Schedule another status check instead of marking the job failed or creating replacement containers on every poll.
Your application should still impose a bounded waiting policy. If the job exceeds that policy, stop automatic polling, retain the last platform status, and move it into an investigation state. An application deadline doesn't prove that Instagram rejected the media, so don't fabricate a platform error.
For ERROR, preserve the returned error payload immediately. For EXPIRED, preserve the terminal state and make any replacement attempt explicit.
This design prevents both premature publication and endless reuse of an unusable container. It also lets a worker resume after a restart without losing track of what it already created.
Rate Limits and the Errors You Will Actually See
An endlessly retrying queue usually means the worker has collapsed different failures into one category. Quota exhaustion, invalid credentials, and rejected media need different next actions.
Start with Meta's content-publishing-limit endpoint: GET /<IG_USER_ID>/content_publishing_limit. Its response can include quota_usage and rate_limit_settings, so check capacity before preparing a large batch.
There's a documentation mismatch worth handling explicitly: Meta's Content Publishing guide describes 100 API-published posts per rolling 24-hour period, while another Meta endpoint documents 50. Don't resolve that discrepancy by hard-coding whichever value suits your throughput target. Read the account's exposed usage and settings and reschedule when capacity isn't available.
Match the symptom to the next action
The Instagram publishing errors, causes and fixes below are triage hypotheses. Read the actual response before deciding that a symptom proves a particular cause.
Symptom | Likely Cause | Fix |
Container stays | Large video still processing or a slow host | Keep polling with backoff; check file size and bitrate |
Container returns | Unsupported format or media URL not fetchable | Validate the MIME type and confirm the URL returns the file without login |
Container is | Publication window elapsed | Create a new container and publish promptly |
| Short-lived token still in use | Use the appropriate long-lived token and refresh before expiry |
Publish call fails after a timeout | Network dropped after the post may have gone through | Check container and media state before retrying so you don't publish twice |
Quota errors at high volume | Account reached its publishing limit | Check |
Failure after a valid container | Page Publishing Authorization missing | Complete authorization for the connected Page where Meta requires it |
Retry only when another attempt can help
Transient conditions: Use exponential backoff for temporary request failures and scheduled status checks. Give each job a bounded retry policy.
Invalid inputs: Quarantine unsupported media and invalid-permission failures. Preserve the payload and request a correction.
Human action: Send a reconnect or authorization alert to the account owner. Pause affected work rather than generating more identical errors.
Ambiguous delivery: Reconcile platform state before resubmitting. Use an application-level idempotency key to prevent duplicate job execution, but don't mistake it for proof of what Instagram published.
Operational boundary: A timeout means you don't know the outcome. It doesn't mean nothing happened.
Track quota, media, and authentication failures as separate counters. That makes the response concrete: delay the batch, replace the asset, or reconnect the account.
Keep Automated Posts Original and Eligible for Reach
Publishing more posts isn't a useful success metric if the account loses discovery opportunities or audience trust. Delivery success and recommendation eligibility are different outcomes.
Instagram's recommendations and originality guidance says it may recommend the original instead of an identical repost, and accounts posting others' content without meaningful enhancement 10 or more times in 30 days may be excluded from recommendation surfaces. Instagram also says stitching clips together or adding a watermark doesn't qualify as a material edit.
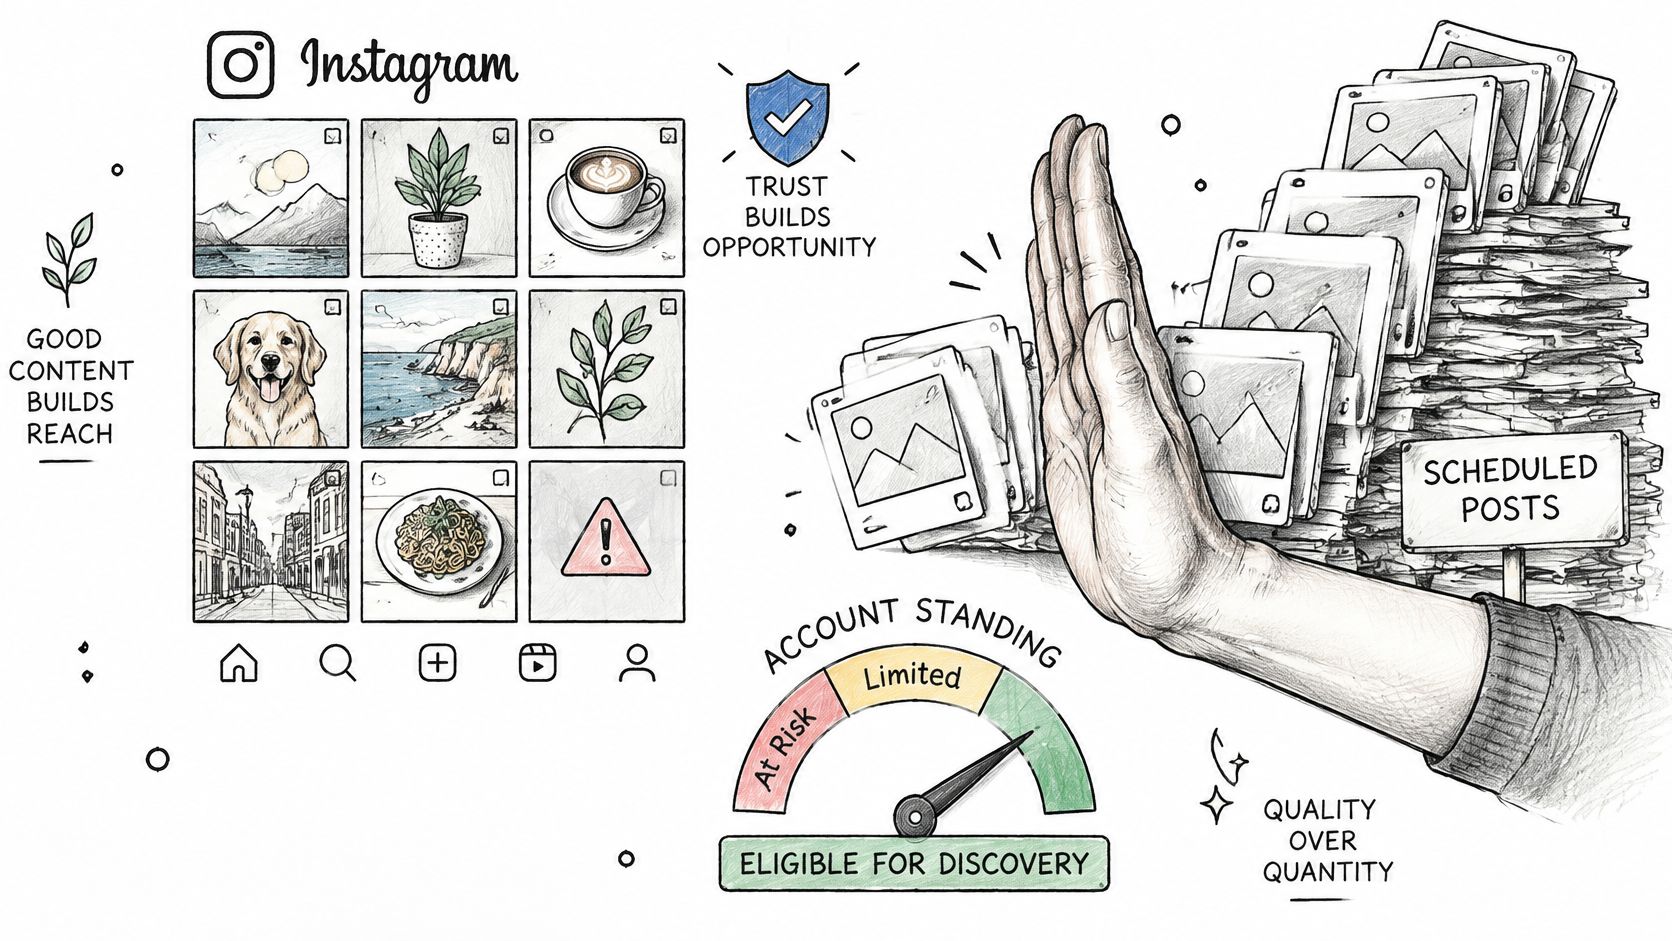 A hand blocking a pile of scheduled Instagram posts while showing an account standing gauge indicator.
Put editorial checks before the queue
Write platform-specific captions. Adapt the explanation and audience context instead of distributing identical text everywhere. A different caption alone isn't proof that borrowed media has been materially enhanced.
Adapt the presentation. Choose an opening hook and aspect ratio for the channel. Treat these as editorial decisions, not tricks that guarantee originality.
Verify provenance and rights. Record who created the asset and the permission to publish it. Attribution and permission are separate questions.
Flag near-duplicates. Compare proposed assets against recent queued and published material. Send suspicious matches for review rather than letting the scheduler decide.
Keep human approval available. Route uncertain ownership, repetitive assets, and questionable edits to someone who can reject or improve them.
These are workflow recommendations, not promises of increased reach. Mechanical changes don't guarantee that Instagram will consider a repost original.
If someone calls every visibility decline a shadow ban, use the guide to what shadow banned means to frame the investigation more carefully. Don't infer an account restriction from a disappointing post alone.
Compare reach and recommendation share for automated and hand-posted content over the same period, where those measurements are available. Keep differences in topic, format, and audience in mind.
If automated posts consistently lag, inspect the editorial inputs before increasing volume. A functioning publisher should make it easier to distribute good work, not easier to repeat weak material.
Pick Your Route and Publish Your First Automated Post
Route | Best For | Where the Logic Lives | Watch Out For |
REST API | Developers building publishing into their own product | Your backend and job queue | You own polling, retries and reconciliation |
n8n node | No-code builders with event-based workflows | The n8n workflow | Keep triggers and retry rules explicit |
Make.com app | No-code teams connecting publishing to many tools | The Make.com scenario | Map media URLs carefully so they stay public |
MCP server | AI agents that publish autonomously | Agent tool calls | Add an approval step for risky or repeated posts |
The automation routes compared differ mainly in where you orchestrate the workflow. With a managed publishing service, you can delegate platform-specific handling, but you still need to inspect the final account-level outcome.
If you're deciding between a simple scheduler and an integration you can build into a product, Creators Toolbox on free scheduling plans provides useful context for comparing those options.
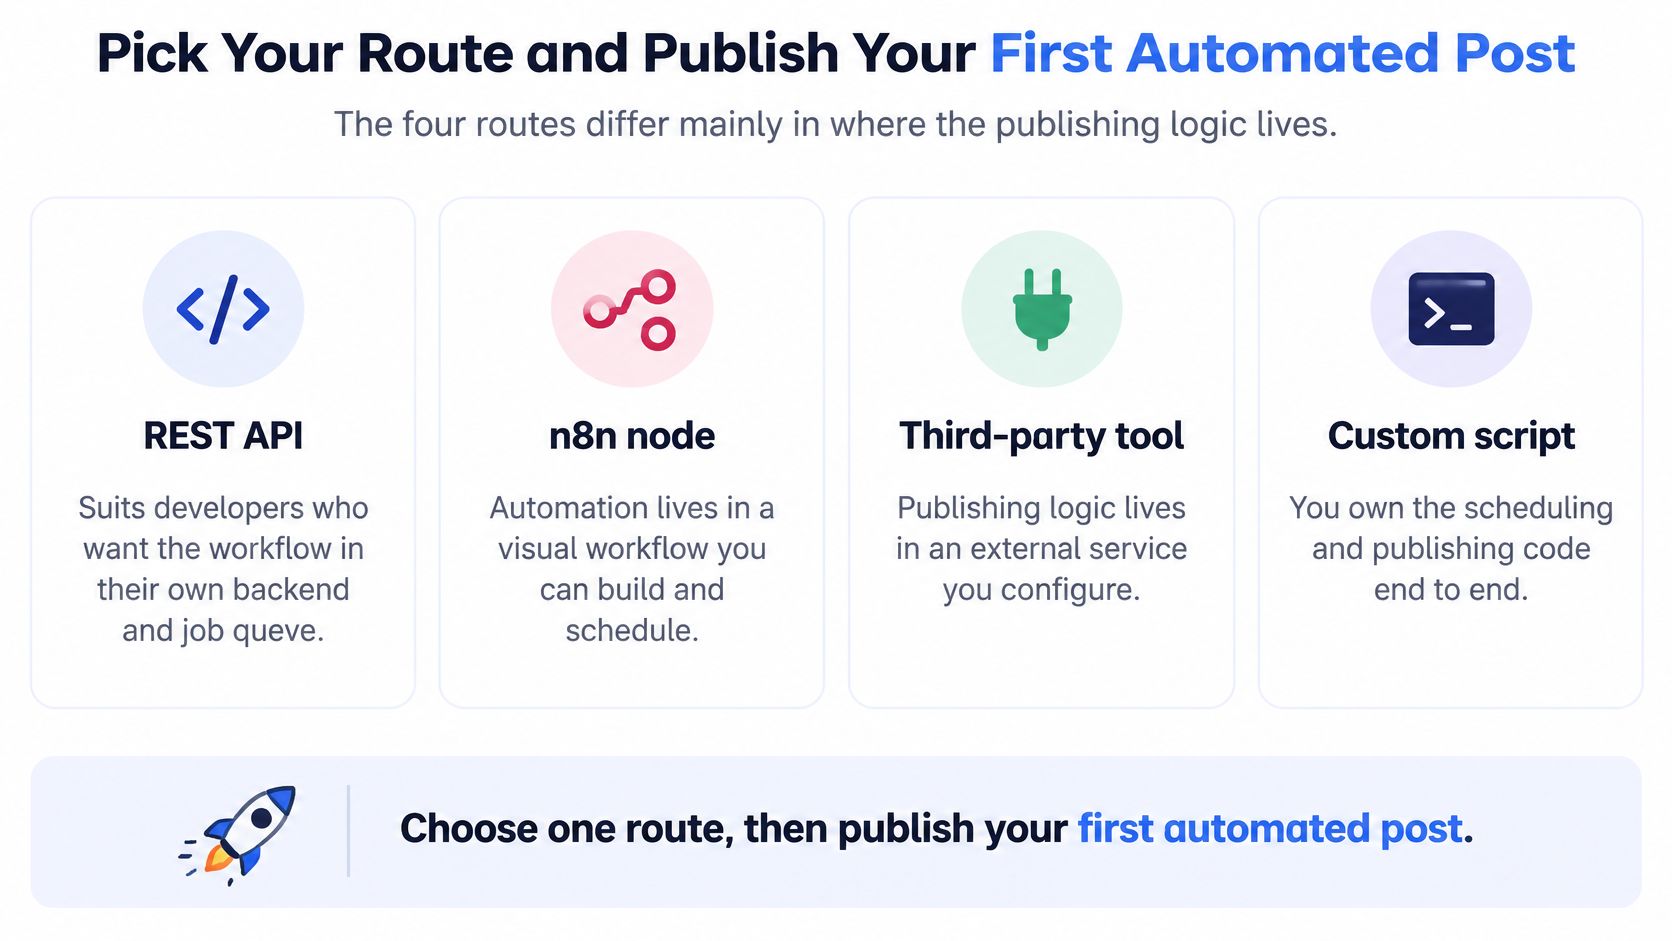 A guide showing four different methods for scheduling and publishing automated social media posts for developers.
Run a small end-to-end test
PostPulse offers all four routes. Our getting started guide explains publishing to 10 social media platforms through the API or n8n integration, and new users can create an account, generate API keys, and publish a first post in minutes.
Create an account and generate API keys. For the integration test, authenticate using your client ID and secret.
Connect the Instagram Business or Creator account through OAuth. Use a test target you're comfortable publishing to.
Fetch connected accounts. Confirm the target account explicitly rather than choosing the first result.
Upload media if needed. Start with a validated asset so you're testing delivery rather than debugging transcoding simultaneously.
Schedule a test post. Keep the first workflow simple before adding cross-platform branching or autonomous content generation.
Inspect the per-account result. Our post details show each connected account's status, plus the platform post ID and public link, or the error message if publication failed.
Don't stop at a successful scheduling response. Confirm the post on Instagram and verify that your application recorded the same outcome. Then exercise a failure path so you know the owner will receive an actionable message rather than silence.
PostPulse provides a REST API, official n8n and Make.com integrations, and an MCP server for automated social publishing, with OAuth and token maintenance handled for you. Visit PostPulse, connect your Instagram professional account, and schedule a validated test post, then check its account-level result before enabling your production workflow.
About the Author
Founder of PostPulse — a social media scheduling platform for creators and teams. Software engineer with a passion for building developer tools and simplifying complex API integrations across social media platforms.