IG Reels Format: Specs for Every 2026 Upload
Published on
Tags:
You export a Reel, it plays perfectly on your phone, and the Instagram app accepts it without a complaint. Then your publishing job fails, the container sits in progress, or the live post crops your headline and buries your call to action under the interface. That gap is the central IG Reels format problem. There's no single number to memorize. There's a pipeline contract made of hard limits, creative recommendations from different Meta documents, and third-party numbers that don't always match either one. If you treat those three layers as interchangeable, you'll ship files that look right and still fail. I recommend separating them before you write a single validation rule, and keeping that separation visible in your code, your export presets, and your error messages.
Table of Contents
Instagram Reels Specs at a Glance
A validator that checks only resolution will pass files the API still rejects. Duration, container size, frame rate and codecs each belong to a different document, and the ads specification sets creative targets while the help center sets upload floors. Read them as one pipeline contract and the failures get predictable.
Spec | Recommended value | Documented limit | Source |
Aspect ratio | 9:16 | 1.91:1 through 9:16 | Instagram help center |
Resolution | 1080 x 1920 | Help center states a minimum width floor | Instagram help center and export guidance |
Ads creative resolution | 1440 x 2560 | No separate organic minimum stated for this creative size | Meta ads guide |
Frame rate | 30 FPS constant | 30 FPS minimum | Instagram help center |
File format | MP4 or MOV | MP4 or MOV | Meta ads guide |
Video codec | H.264 | No alternative codec range stated | Meta ads guide |
Scan type | Progressive | No alternative scan type stated | Meta ads guide |
Audio codec | AAC stereo | No alternative audio codec stated | Meta ads guide |
Audio bitrate | 128 kbps or higher | No lower documented floor stated | Meta ads guide |
Maximum file size | Below 4 GB, with smaller files ingesting faster | 4 GB | Meta ads guide |
Duration | Plan for 0 to 15 minutes for ads placements, up to 20 minutes to record or edit organic Reels | Up to 20 minutes to record or edit; 0 to 15 minutes in ads guide | Instagram help center and ads guide |
The Meta advertising specifications for Instagram Reels recommend a 9:16 aspect ratio, MP4 or MOV video, H.264 compression, progressive scanning, stereo AAC audio at 128 kbps or higher, and a recommended resolution of 1440 by 2560 pixels. That same guide permits files up to 4 GB and lists video durations from 0 seconds to 15 minutes for that placement. That is an ads creative size, not an organic export target. I recommend keeping 1080 by 1920 as the default master and reserving 1440 by 2560 for paid variants that need the extra density.
How to Read the Three Columns
Treat the recommended column as your export target and the documented limit as your floor. Where a cell says no alternative or no floor is stated, leave it unknown in code. Do not invent a bitrate minimum or a second accepted codec to fill the gap. Those invented checks become false rejections later, and they hide the actual failure point when a container stalls.
For creators cutting music-driven clips rather than building a pipeline, Reels video guidance for independent artists covers the creative side of fitting a track to this same vertical canvas. Engineers should carry the duration split and the ads versus organic resolution split into the validation steps ahead, since those two rows cause most mismatches between a clean preview and a failed publish.
Aspect Ratio and Resolution Rules
This short visual sums up the geometry problem before you reframe anything by hand.
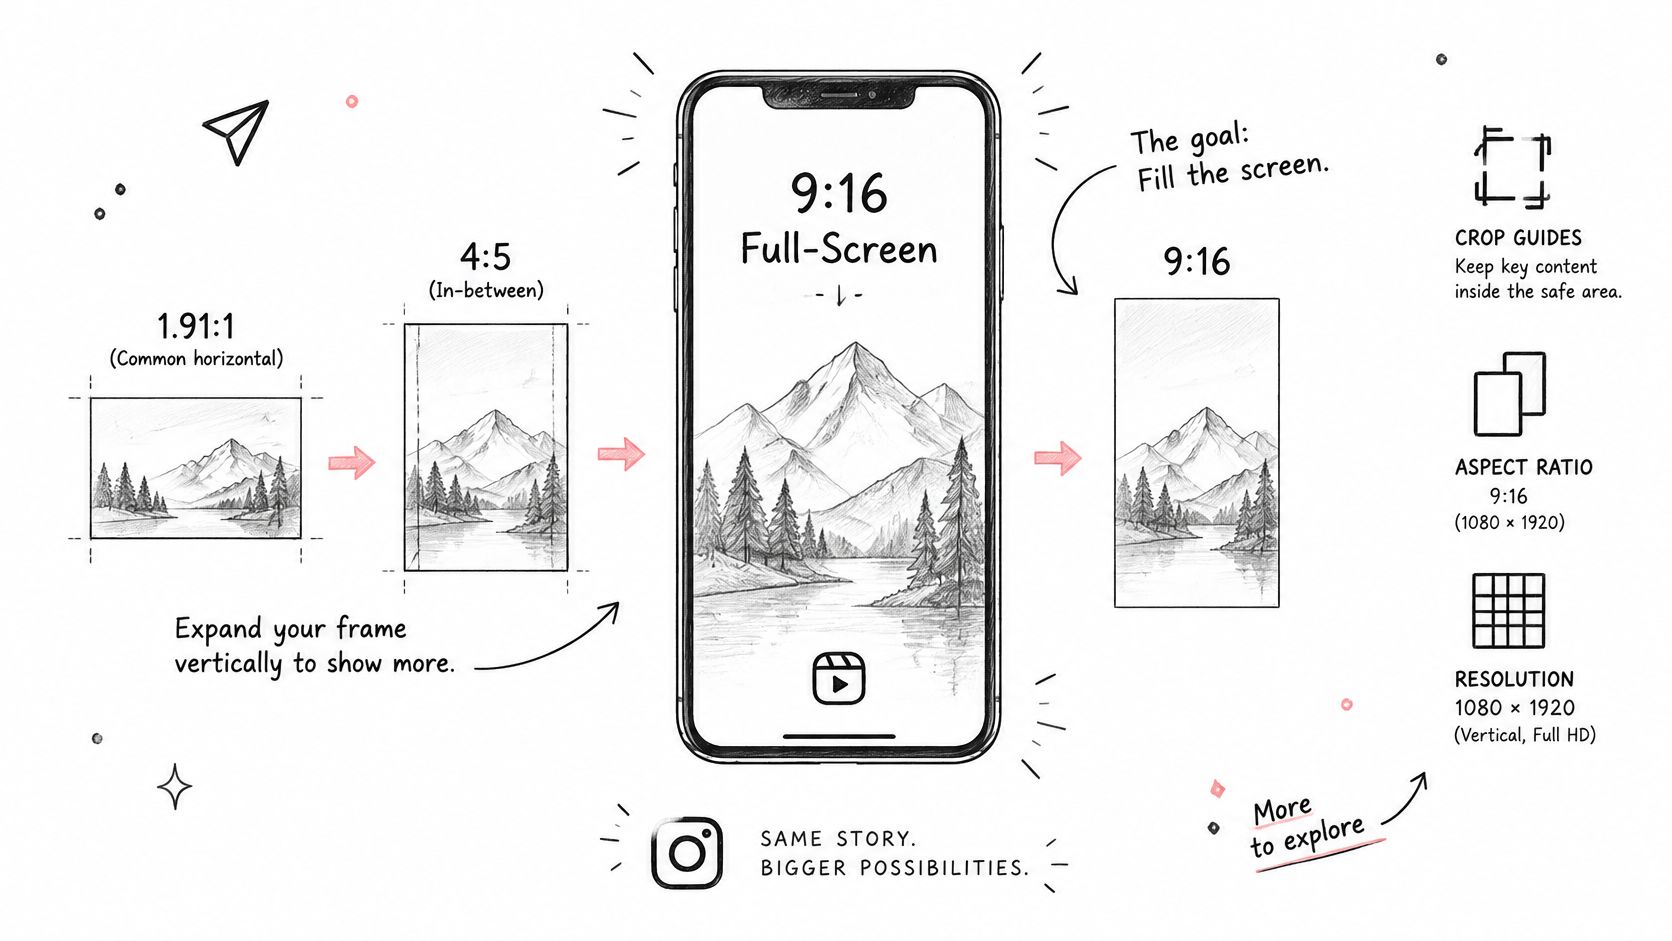 An educational infographic illustrating the transition from standard landscape photo ratios to Instagram vertical full-screen video format.
Instagram accepts a range of shapes, but only one fills the phone. 9:16 is the full-screen target. Anything wider within the allowed range is accepted, but it leaves part of the screen empty and shrinks your subject. That range is a compatibility rule, not a styling recommendation. The platform tolerating a wider frame doesn't mean a wider frame is a good creative choice.
What Each Ratio Means for Framing
Each shape inside the range asks something different from your crop and your subject placement.
9:16: Fills the screen edge to edge. This is the default for any Reel built for full-screen playback.
4:5: Taller than square, shorter than full screen. It reads well in the feed but gives up vertical space in the Reels viewer.
1:1: Square. Familiar and safe, but it wastes a large share of a tall phone screen.
16:9: Horizontal. Accepted at the wide end of the range, but it sits small inside a vertical viewer unless you reframe it.
If your source is horizontal, reframe or crop it rather than letterboxing it. Black bars waste screen space and signal that the clip wasn't made for this surface. Viewers feel that instantly, even if they can't name why.
A Worked Reframing Example
Say you start with a 1920 by 1080 clip and need a 1080 by 1920 vertical master. Don't scale the whole frame down and pad the top and bottom. Instead, choose a vertical crop window that keeps the subject in the central column, then pan that window only when the subject moves out of it. A speaker standing left of center, for example, gets a window anchored on them, not a blind center crop that slices them in half.
Keep the 720-pixel minimum in view as you do this. A tight crop pulled from a soft source can drop below a usable resolution fast, especially once the platform compresses it again. If the crop looks mushy on a phone held at arm's length, reshoot vertically or pick a wider, cleaner section of the source. Geometry gets you accepted. It doesn't get you watched.
Reels Duration Limits and What Changes With Length
The timeline below tracks how the ceiling moved from a tight launch constraint to today's longer format.
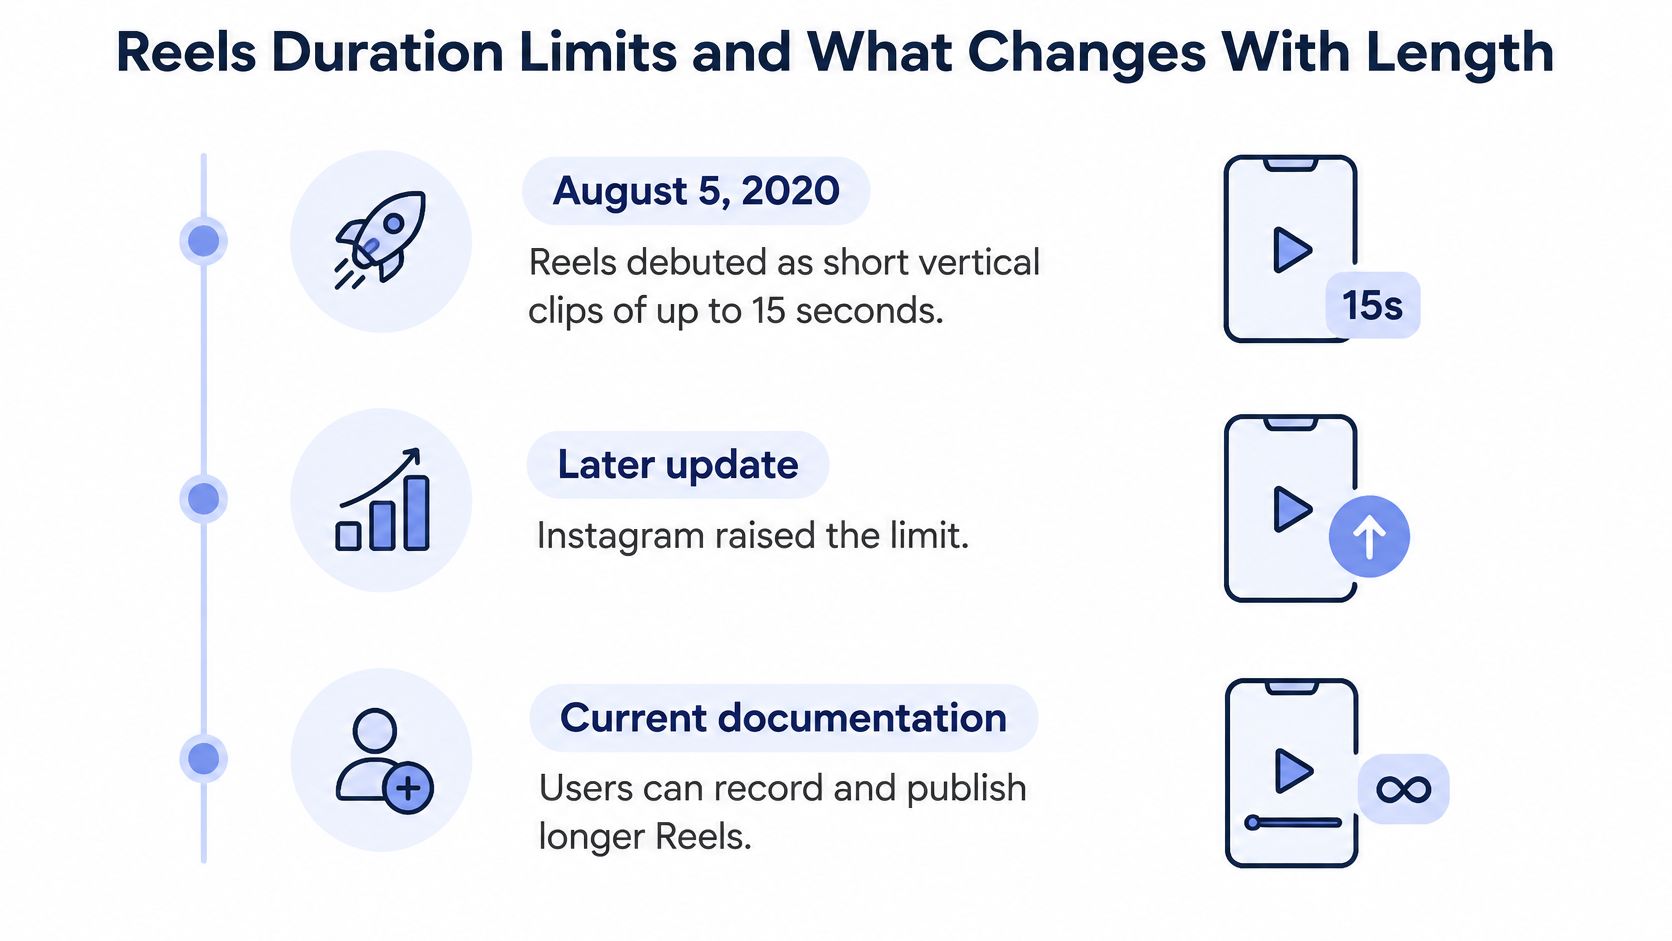 A timeline graphic showing the evolution of Instagram Reels video duration limits from 15 seconds to longer.
Reels started small. The MarkStudios research on Instagram Reels statistics records that Instagram introduced Reels on August 5, 2020, initially defining the format as short, multi-clip vertical videos of up to 15 seconds, and that current product documentation says users can record and edit Reels up to 20 minutes long. That is roughly an 80-fold increase from the original limit. Separately, the ads guide lists 0 to 15 minutes for the Reels placement. Those two figures aren't in conflict. They describe different surfaces, and your pipeline needs to know which one applies to the job in front of it.
What the Limit Does Not Tell You
A maximum duration describes what the product allows. It says nothing on its own about how a given account will distribute a long upload, and no documented figure here ties a specific length to a specific reach outcome. Don't encode a guess about new-viewer distribution into your scheduler as if it were a rule. Test length on the account you're publishing to, and check a long upload against that account's currently supported limit before you queue it.
Here's the practical rule I would give any team, regardless of total length. Keep the hook and the call to action inside the first 15 seconds. That habit survives from the original format, and it protects you even when the clip runs longer. A viewer who leaves early should still have seen the point.
Practical rule: Put detailed material that needs rereading into a carousel or a long-form caption, and let the Reel do the job of earning the first look.
Length buys you room. It doesn't buy you attention. Spend the extra seconds only when each one still gives the viewer a reason to stay.
Export Settings for Full-Screen Vertical Playback
This graphic pairs with the single export profile below, so keep both in view while you set up your preset.
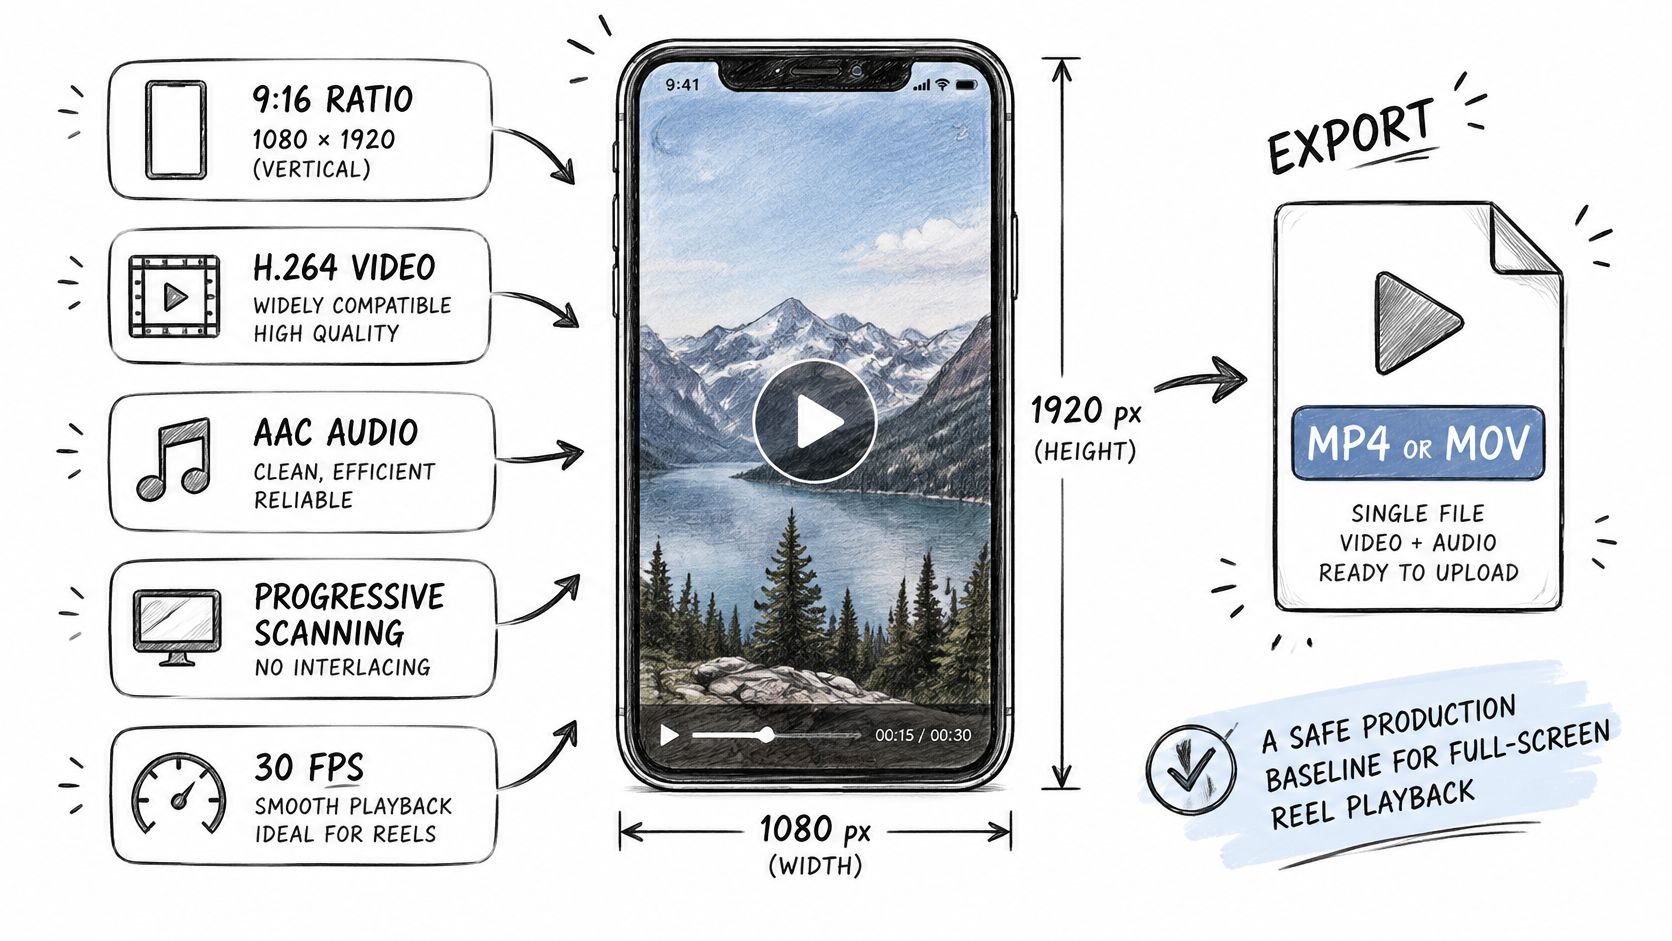 An infographic showing optimal technical settings for creating high-quality Instagram Reels video content for mobile.
Build one preset and stop improvising per post. The Instagram help documentation on Reel upload requirements allows aspect ratios from 1.91:1 through 9:16, requires at least 720-pixel resolution, and sets a minimum frame rate of 30 FPS. Against that floor, your production baseline is a single vertical MP4 or MOV at 1080 by 1920, 9:16, H.264 video, AAC audio, progressive scanning, and a constant 30 FPS. That's the safest cross-surface profile for full-screen playback.
Why Constant 30 FPS Is the Target
The documented minimum is 30 FPS, so exporting at a constant 30 clears the floor without introducing variable frame rate weirdness in editors and transcoders. Broader third-party ranges such as 23 to 60 FPS show up on spec sheets, but they aren't Meta's stated limits. If your camera shoots higher and the motion benefits, test it. Don't treat a wider third-party range as permission in your validator.
Bitrate is where honesty matters. There's no documented bitrate figure here for text-heavy or fine-detail frames, so set it by testing instead of copying a number from a forum. Export a short clip with your smallest on-screen text, watch it on a phone after upload, and raise quality until the text survives compression. Only then commit the preset to a batch.
This walkthrough shows the export settings being applied, which helps if you're configuring an editor for the first time.
Safe Zones and the Cover Frame
Platform interface elements can obscure content near the top, bottom, and sides, particularly in feed, profile-grid, and Reels-viewer placements. Keep titles, subtitles, logos, and calls to action inside a central safe region. Concrete example: a caption line parked at the bottom edge gets covered by the viewer's interface, so it moves up into the central region where nothing sits on top of it.
For the cover, the default thumbnail is the first frame unless you set a time offset. If a deterministic thumbnail matters for your grid, generate a JPEG cover and keep it with the video instead of hoping frame one happens to be a good poster. First frames are often a fade from black. That's a terrible cover, and it's entirely avoidable.
Pre-Upload Checks Before You Send a Reel
Run these checks on every file before any API call, ordered from cheapest to most expensive. Catching a bad file locally costs milliseconds. Catching it after container creation costs a failed publish, a confused retry, and a log you have to untangle.
The Seven Checks in Order
Confirm the container: It's MP4 or MOV, verified from the file's real bytes rather than its extension. On failure, reject. A renamed file is not a transcoding problem, it's a bad input.
Confirm the shape: The aspect ratio sits within the documented range and the frame is 9:16 for full-screen output. On failure, hold for reframing, since an automatic crop can cut off a subject.
Confirm resolution and frame rate: The shorter side clears the minimum and the frame rate clears its floor. On failure, re-encode if a clean source exists, otherwise reject.
Confirm duration: It fits the band the target account supports. On failure, hold for review, because trimming changes the edit someone approved.
Confirm audio: An audio track is present and encoded with AAC. On failure, re-encode, since silent or misencoded audio is usually an export mistake.
Confirm file size: The file sits under the documented ceiling. On failure, re-encode at a saner quality setting.
Confirm the source URL: It's publicly reachable over HTTPS without authentication, and it will stay up during ingestion. On failure, reject the URL, not the video, and rehost the file.
Check one is the step that gets skipped, and it is the one that saves the most time. A file renamed to .mp4 passes on its filename and then fails at container creation, where the error points at the wrong layer of your pipeline.
A confirm step on the publishing side catches some of what slips through. PostPulse's media validation check that reads a file's real type from its bytes refuses anything that is neither an image nor a video and answers 400 naming the type it found, alongside an integrity check on what reached storage. Treat that as a backstop for files your own validator missed, not as a substitute for running these seven checks first.
Reject or Transcode
Those are different decisions, and blurring them causes quiet damage. Rejection is safer for predictable output because a human sees the defect and fixes the source. Silent transcoding can change a file a reviewer already approved, shifting framing, softening text, or altering audio without anyone noticing until the post is live.
Record the reject-or-transcode decision for every file. When a publish fails three steps later, that record is what lets you trace whether the input was ever good.
One policy point worth stating plainly: PostPulse is not liable for rejected posts caused by platform-specific content requirements, such as media ratio or length limitations. That's exactly why these checks belong on your side of the API call. A platform rejection for a wrong ratio is preventable, and preventing it is your pipeline's job, not the platform's error message.
How to Publish a Reel Through the Graph API
A scheduled Reel fires at 09:00. The job has two API calls and an asynchronous gap between them. Designing your queue around one upload-and-post request is a common cause of flaky integrations, because the container is only preparation and the publish is a separate state transition.
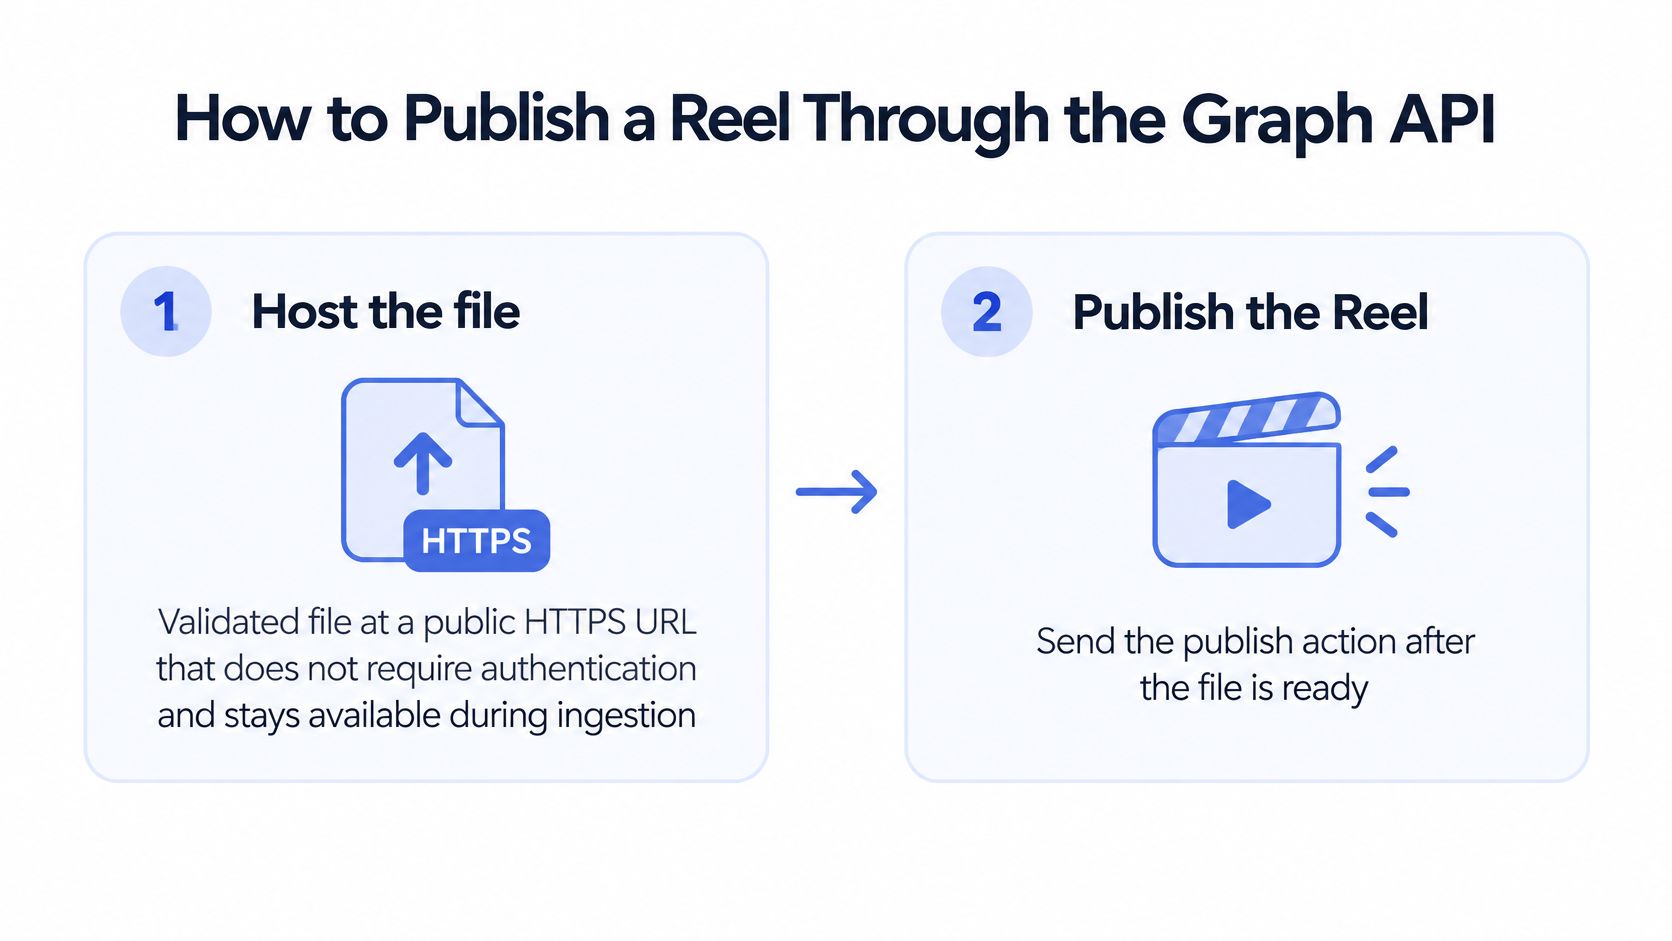 A two-step diagram explaining how to publish an Instagram Reel using the Graph API.
Meta's content publishing guide defines the sequence: send POST /{ig-user-id}/media with media_type=REELS and a publicly reachable video_url, keep the returned container ID, then send that ID to POST /{ig-user-id}/media_publish. The same guide exposes thumb_offset in milliseconds for choosing a cover frame. Omit it and the first frame becomes the thumbnail.
The Publish Sequence Step by Step
Host the validated file: Put it at a public HTTPS URL that doesn't require authentication, and keep it available for the whole ingestion window. A private object-storage URL fails here, before any clever code matters.
Create the container: Send POST /{ig-user-id}/media with media_type set to REELS and video_url set to the hosted file. Add the caption, plus thumb_offset in milliseconds if you want a specific cover frame.
Store the container ID: Persist the ID the API returns before you do anything else. This is your handle for polling and publishing, and losing it forces a duplicate on retry.
Poll with backoff: Check the container status until it reports FINISHED, spacing out your checks instead of hammering the endpoint.
Publish: Send POST /{ig-user-id}/media_publish with the container ID. Publishing before status is FINISHED fails at this step, so gate the call on that status.
Set feed sharing: Use share_to_feed=true to request distribution in both the Feed and Reels tabs, or share_to_feed=false to request placement only in the Reels tab.
Store the result: Save the final media ID and publish time so your records match what's live.
Our Instagram Reels API reference maps these same states into the publishing calls you'd make against a unified endpoint.
Container creation is preparation. Publication is a separate state transition, so treat them as separate jobs in your queue with separate retries and separate logs. The hard limit is state order: publish only after FINISHED. Cover selection is a creative decision, and the API will accept a frame offset without judging composition. If deterministic thumbnail presentation matters, generate a JPEG cover and keep it with the video rather than relying on a frame offset alone.
Where Adjacent Automation Fits
Teams building reporting around a publish often need a document step too, such as a proof or client summary generated from the same job data. If that's in your stack, you can automate PDF creation with API calls alongside the publish record, so the media ID, cover, and caption land in an artifact your team can archive. Keep it downstream of a successful publish, not tangled into the container flow itself, so a document hiccup never blocks a post from going live.
Container Status Errors and How to Fix Them
Your container has been in progress for twenty minutes. Is it stuck, slow, or dead? You can't tell from the status alone, and retrying blindly is how you end up with two copies of the same Reel and no idea which one your caption edits went to.
Ingestion is asynchronous, so the fix depends on the state you failed in. The Instagram Graph API media reference underpins the model where, after creating the container, the application must monitor processing status and publish only after Instagram has successfully ingested the video. Third-party spec sheets commonly cite ranges like 23 to 60 FPS and roughly 3 seconds to 15 minutes, but those figures should not replace Meta's own requirements in your validator.
Symptom | Likely cause | Fix |
Container stays IN_PROGRESS | Ingestion still running or source URL slow to respond | Poll with backoff and confirm URL reachability before giving up |
Container returns ERROR | Unsupported codec, dimensions or duration | Re-encode to the export profile and create a new container |
Publish call fails before processing ends | Publish sent before status is FINISHED | Gate the publish call on FINISHED status |
Duplicate Reel after a retry | Container ID not stored, so the retry recreated it | Store the container ID and reuse it on retry |
Permission or authentication error | Token scope or account type problem | Check token and permissions separately from media errors |
Cover frame is wrong | Default cover is the first frame | Set thumb_offset in milliseconds |
Four Failure Categories, Four Different Fixes
Log and alert on upload failure, processing failure, permission failure, and publish failure separately. They need different remediation. Re-encoding a video won't fix a token problem, and refreshing a token won't fix an unsupported codec. Teams that funnel all four into one generic publish error waste hours repeating the wrong fix.
For retries, idempotency is the whole game. Store the container ID, processing state, retry count, and final media ID, so a transient polling or network failure never creates a second Reel. A retry should resume from the stored state, not restart from container creation. If your retry logic can't tell whether a container already exists, it isn't retry logic. It's a duplicate generator.
A container that sits in progress is not automatically broken. Confirm the source URL still responds before you abandon it, because a slow host looks identical to a stuck ingestion.
For large files or unstable connections, the API's resumable upload flow can help, since you're not restarting a big transfer from zero after every drop. Most of the errors in the table, though, are preventable upstream. The stricter your pre-upload profile, the fewer containers you'll ever have to debug.
Choose Reels or Carousels Before You Schedule
A product launch with strong photography and a reach target calls for two different assets from the same shoot. Cut a concise 9:16 version for discovery, then place specs, comparisons, and pricing in a carousel where viewers can pause and reread. Reels and carousels do not win at the same outcome, so assigning each post an objective first prevents the habit of forcing every idea into video.
Buffer's analysis, cited in Buffer's data resources on social media performance, found that in an analysis of more than 4 million Instagram posts Reels generated 36% more reach than carousels and 125% more than single-image posts, but carousels produced 12% more engagement than Reels. Analysts at Buffer frame this as a trade-off. Reels suit discovery and new-audience reach. Carousels can suit saves, comments, and deeper interaction, where a viewer slows down and works through slides.
A Decision Rule You Can Automate
Classify each post by objective: reach, engagement, education, or conversion. Then adapt the asset to the format instead of cross-posting the same file everywhere. The same shoot produces two jobs, neither one compromised.
Say you have strong product photography and a reach goal. You could turn product photos into videos for the discovery cut, then keep the specifications and comparisons in a carousel where people can pause and reread them. Our Instagram carousel API reference covers publishing that second asset through the same workflow.
Put a format field on every scheduled post, and check it against the duration band and your validation rules before anything publishes. Instagram posts can be published as FEED, REELS or STORY, and can be labelled as AI-generated content, so that format field maps directly to a real publishing option rather than a note in a spreadsheet. For videos, the confirm step verifies that the video container is readable. That optional confirm step checks that the uploaded file reached storage, runs a basic integrity check, and detects the file's real type from its bytes.
Set the format rule, run the checks, publish, and confirm the live Reel before you schedule the next batch. I recommend enforcing the rule in code, not in a shared doc, because a field the scheduler validates beats a guideline nobody checks.
If you publish to several platforms, PostPulse provides one REST API that handles OAuth, token refresh and rate limits, so you integrate once and publish to Instagram and eight other platforms.
About the Author

Founder of PostPulse — a social media scheduling platform for creators and teams. Software engineer with a passion for building developer tools and simplifying complex API integrations across social media platforms.