How to Post to Instagram from a PC the Right Way
Published on
Tags:
You've got the finished edit on your workstation. The captions are written, the cover frame is picked, and the file is sitting in a folder next to fifty other brand assets. Then you open Instagram on desktop, upload it, and find yourself reaching for your phone anyway because the audio, stickers, or effects you need aren't there.
That's the core tension with learning how to post to Instagram from a PC. The desktop path works, but it doesn't do everything the mobile app does, and the right method depends entirely on whether you're publishing once, running a team calendar, or building software that publishes for other people.
Table of Contents
Why Posting to Instagram From a PC Is Harder Than It Should Be
PostPulse as the Automation Layer Across REST, n8n, Make.com, and MCP
Image and Video Specs, Carousel Pitfalls, and the Mobile Feature Gap
Why Posting to Instagram From a PC Is Harder Than It Should Be
You export a polished 4K Reel from your editor, open Instagram.com, drag the file in, and the upload itself works fine. Then you look for trending audio. It's missing. Stickers are missing. The advanced editing tools you use on your phone aren't in the browser, so the workflow you tried to escape pulls you straight back to mobile.
That gap has history. Instagram began rolling out desktop feed creation globally on October 21, 2021, after testing it with selected users starting in June 2021 according to coverage of the desktop publishing rollout. Before that, the desktop site handled viewing, notifications, and messaging, but not grid uploads. Even that first release was narrow, covering photos and videos shorter than 1 minute, with Stories and Reels left out at launch.
So desktop publishing is official, not a hack. It just never arrived as a full copy of the app.
Five Tiers, Five Different Jobs
Native web upload: Fast, manual, one person, one post.
Meta Business Suite: Scheduling, permissions, and multi-account team work.
Creator Studio: The older scheduling surface many teams still reference, now largely folded into Business Suite.
Content Publishing API: Direct integration for your own product or internal tool.
PostPulse: An abstraction layer when you don't want to own OAuth, containers, and multiple platforms yourself.
The scale makes getting this right worthwhile. Instagram's potential advertising reach was approximately 1.74 billion users worldwide in January 2025, about 26.9% of the global population aged 13 and above based on DataReportal's compilation of Meta advertising tools. Those are advertising reach estimates, not a census of posters, but teams publishing across countries still need a desktop workflow that handles large files, approvals, and repeatable operations.
Even creative formats expose the seams. A wide image split across carousel slides, for example, needs careful preparation before upload, which is why a guide on how to post panoramas on Instagram is useful reading if you're building that kind of post on a computer. The file prep happens on PC. The publishing constraints still come from Instagram.
Native Web Upload and Meta Business Suite for Manual Posts
Start with the simplest path. Open Instagram.com in a desktop browser, sign in, and select the + creation button. Choose files from your computer or drag them into the upload window, apply basic edits and cropping, then write your caption, add a location, tag people, add alt text, and publish.
The desktop setup below is exactly where this workflow shines, because your source files, caption drafts, and brand folder are already on the machine.
 A hand using a computer mouse to post a photo to Instagram from a desktop PC setup.
What works well here is the asset and metadata layer. Feed photos, feed videos, basic Reels uploads, captions, locations, tags, collaborators where available, and accessibility text all fit a keyboard and large screen. What doesn't carry over reliably is the mobile creation layer, including Instagram-library music, advanced audio editing, effects, stickers, and camera-based capture.
PC publishing is best understood as a reliable asset-upload and metadata workflow, not a full replacement for mobile creation.
When Business Suite Is the Better Manual Tool
Meta Business Suite adds the operational controls a team needs. Sign in, select the connected Instagram account, choose Create post, upload media, write the caption, add location and accessibility text, configure tags, preview the crop, then publish or schedule.
Permissions are the prerequisite people skip. In Business Suite, the operator needs Full control or Content permission for the relevant Page or Instagram account as described in SocialPilot's guide to Instagram publishing workflows. Verify the correct Business Portfolio, the Page-to-Instagram connection, and the publishing role before anyone prepares content.
Wrong account selected: The post lands on the wrong brand profile because multiple assets sit in one portfolio.
Missing Content permission: The publish control is unavailable, or scheduling fails without a clear reason.
No preview check: The desktop crop looks fine, then the mobile grid cuts off text or faces.
Use Instagram web when one person needs to publish quickly. Use Business Suite when scheduling, approvals, multiple accounts, or shared access enter the picture. That distinction sounds obvious until a contractor publishes to a client account they were only supposed to draft for.
Creator Studio and Scheduled Publishing Workflows
Creator Studio was the name many teams learned for desktop scheduling, and you'll still see it in old playbooks and client instructions. In practice, Meta Business Suite has absorbed the scheduling work teams need, so treat Creator Studio as the legacy label and Business Suite as the current operating surface.
Scheduling changes the job from uploading to planning. A functioning desktop calendar usually starts outside Meta's tools, in a shared doc or board where captions get reviewed before anyone touches the composer.
A Repeatable Desktop Scheduling Routine
Draft captions collaboratively: Write and approve copy where comments and revisions are easy to track.
Export platform-ready assets: Prepare 1:1, 4:5, and 9:16 versions intentionally instead of letting the uploader crop for you.
Load the planner: Add media in Business Suite, select the correct account, and assign publish windows.
Record every post: Keep the original file and log the post URL, timestamp, media type, and outcome.
That log sounds bureaucratic until something underperforms and nobody can reconstruct which export, caption, or crop went live. It also makes testing possible. Change one variable at a time, whether that's creative, caption, posting time, or format, so later results tell you something specific.
Stories need the same discipline, because a Story scheduled without checking account, timing, and format creates the same mess as a feed post. If Stories are part of your calendar, work through a dedicated workflow for scheduling Instagram Stories before you batch a month of them.
For measurement, don't judge scheduled posts by likes alone. Compare reach, impressions, saves, shares, comments, and follower activity through a Professional account, and check results at fixed intervals such as 24 and 72 hours following the measurement approach outlined by SQ Magazine. This tier is still manual labor. You just get a file system, a keyboard, and approval controls the phone doesn't give you.
The Content Publishing API and Container-Based Posting
The API tier starts with eligibility, not code. Meta's Content Publishing API supports Business and Creator accounts, so don't assume a personal Instagram account can publish through an API integration as specified in the Instagram Platform overview. Having a browser open doesn't grant API access, and Creator support still depends on your app holding the required permissions.
Creator accounts were added alongside Business accounts in Meta's June 2023 update announced in Meta's Content Publishing API update. That same update raised the daily media-post limit from 25 to 50 across Reels, Stories, and Feed posts.
The flow below shows why API posting feels different from clicking Share on desktop.
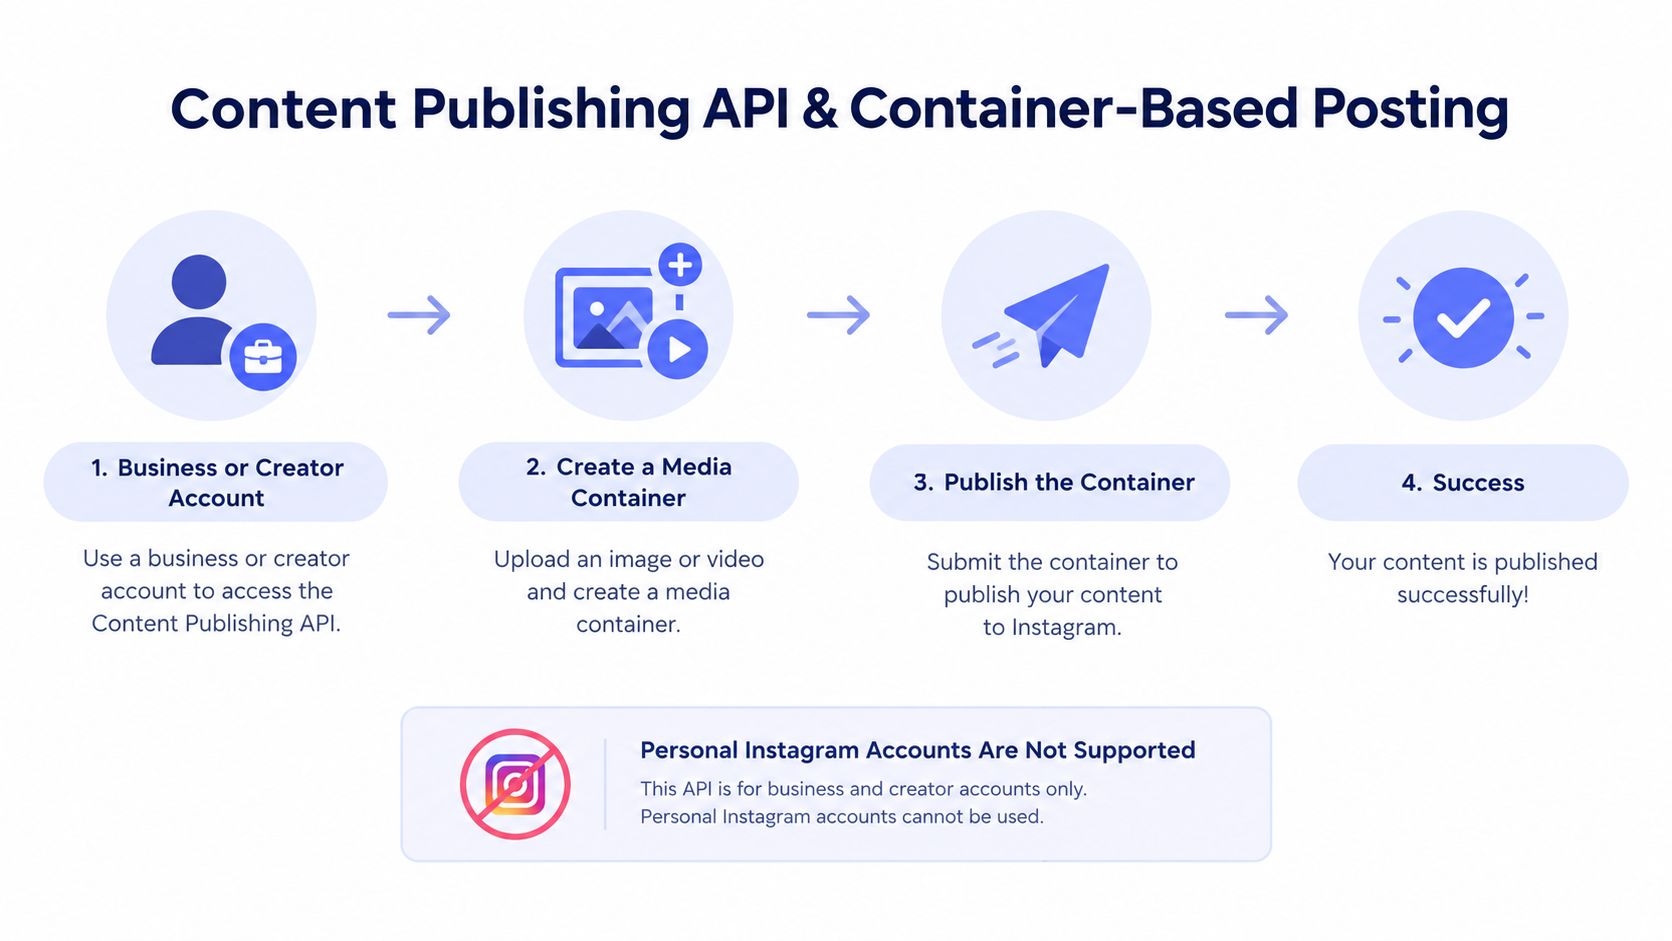 A four-step infographic explaining how to use the Content Publishing API for Instagram business and creator accounts.
Create the Container, Then Publish It
Publishing is a two-step process. Your client first creates an Instagram media container, then publishes that container in a separate request as illustrated in Meta's Tailwind integration story. Retain the container identifier, check processing state where required, and only then issue the publish call.
Naive implementations fall over here. An upload can succeed while nothing is live, because container creation and publication are separate operations. If your code treats step one as success, users will report missing posts while your database confidently says everything worked.
The API supports single images, videos, Reels, and carousel posts containing multiple images or videos. Treat those as distinct media objects in your design. A carousel isn't a batch of independent feed posts, it's a parent structure referencing child items, and a Reel isn't just a standard video post with a different label.
Query the Quota Instead of Guessing
Meta documents a quota of 50 media posts per account in a rolling 24-hour period in its current API reference example documented in the content_publishing_limit reference. The endpoint accepts a since Unix timestamp no more than 24 hours old and can return quota_usage, quota_total, and quota_duration, with 86,400 seconds shown in the example.
Don't hard-code that allowance. Query /{IG_USER_ID}/content_publishing_limit per account so your scheduler knows actual usage before it queues another publish. For the broader endpoint and permission picture, read through detailed Instagram API documentation before designing your data model around assumptions.
PostPulse as the Automation Layer Across REST, n8n, Make.com, and MCP
Direct API integration gives you control, and also gives you Meta app review, OAuth refresh, container state handling, quota checks, and version changes forever. PostPulse sits in that gap as an automation layer, providing the verified Meta, TikTok, and Google apps so teams can skip building and maintaining each platform integration themselves.
The product surface below shows the connected-account model behind that abstraction.
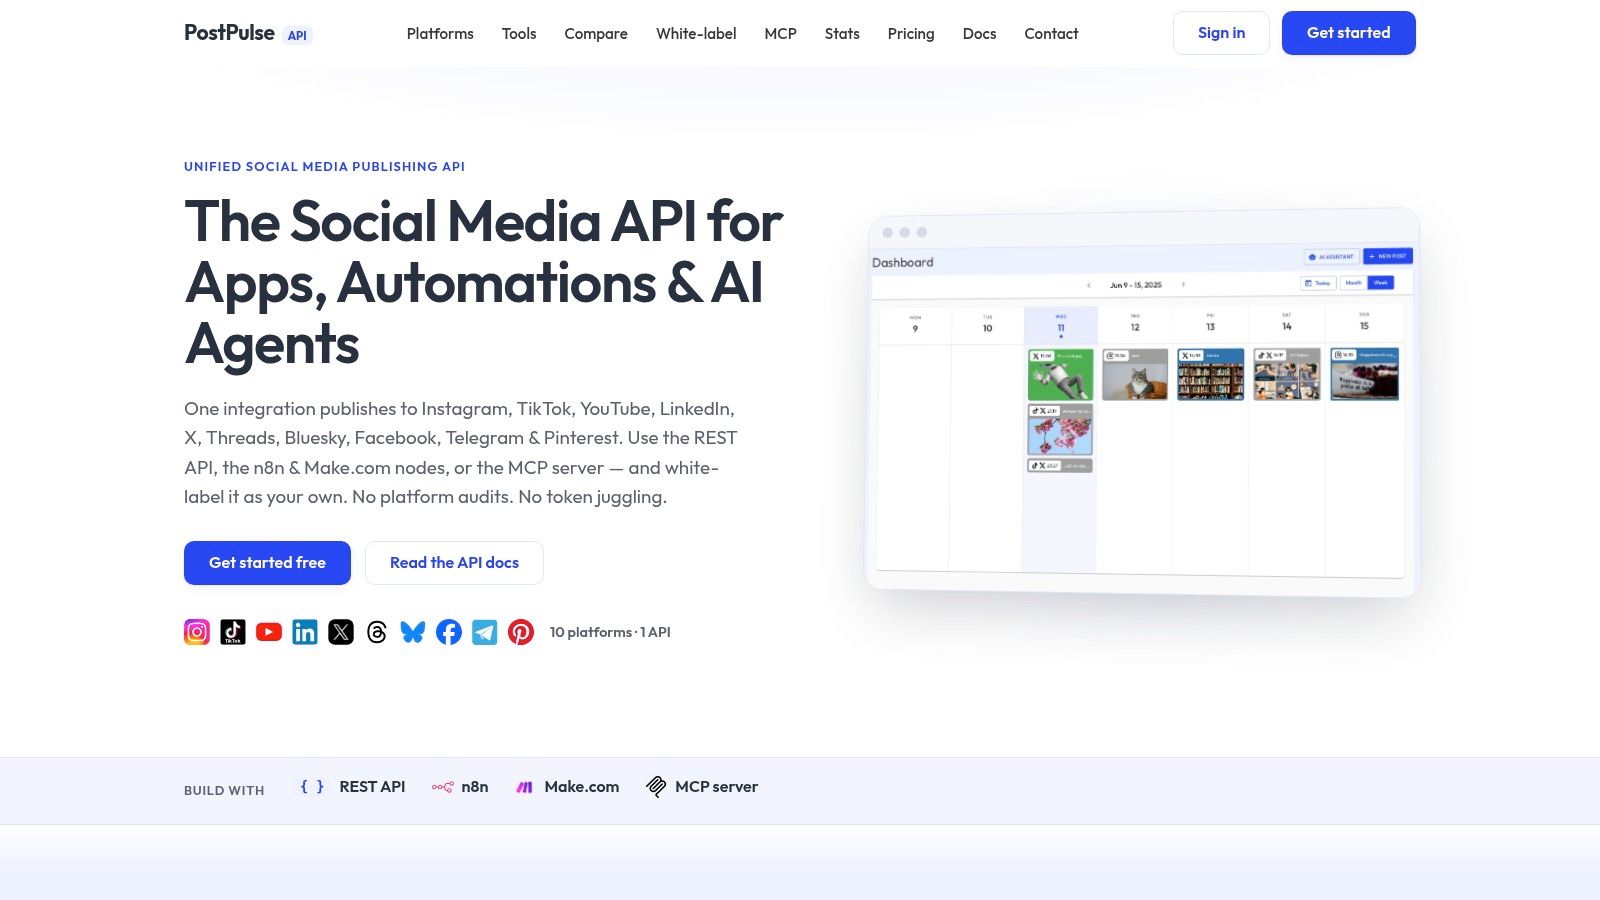 Screenshot from https://post-pulse.com
Four Shapes of the Same Publishing Primitive
Unified REST API: For app developers who want one HTTP surface for publishing to Instagram and eight other platforms.
Official n8n node: For no-code builders wiring Airtable, Notion, or other triggers into scheduled posts.
Official Make.com app: The same capability for teams already standardized on that visual builder.
MCP server: For AI agents that need to publish autonomously through a tool interface.
Choosing between them is mostly a stack question, not a feature question. If your product already has a backend, REST fits naturally. If operations staff own the workflow, n8n or Make.com keeps them out of your codebase. If an agent produces the content, MCP avoids a custom wrapper. That kind of coordination is where orchestrating creative production workflows matters, because generation, approval, and publishing rarely live in one tool.
The short walkthrough below shows how that publishing flow looks when the platform plumbing is handled for you.
Pricing splits into two tracks. Private-Label costs $0.20 per publication or $5 per account per month with unlimited posts, while White-Label costs $200 per month plus $1 per active social account, where active means the account published at least one post that month. There's also a startup support program for builders still in beta. Use this tier when you've outgrown manual scheduling but don't want to own the Meta integration in-house.
Image and Video Specs, Carousel Pitfalls, and the Mobile Feature Gap
Before uploading anything from a PC, normalize the asset to the format you intend to publish. Use 1:1 or 4:5 for feed placements and 9:16 for Reels, then preview the crop on both desktop and mobile. If you're exporting vertical video across several platforms, check current vertical video dimensions alongside a broader MyKaraoke Video spec reference so one export doesn't break another destination.
Carousels deserve special suspicion. Instagram applies one overall orientation treatment to the carousel, so mixed aspect ratios can be cropped or padded unexpectedly as explained in Dohoo's guide to posting from a computer. Normalize every slide to one canvas before upload, and treat the first slide as the visual anchor.
Item counts are another trap. One source reports carousel support up to 20 items, while a desktop-focused source reports 10, so verify the limit your account and current interface present rather than trusting a fixed number in a tutorial. Platform limits and interface limits aren't always the same thing.
PC Publishing vs Mobile Publishing Feature Coverage
Feature | PC Web | PC API / PostPulse | Mobile App |
Feed photos and videos | Yes | Yes | Yes |
Reels upload | Yes | Yes | Yes |
Captions, location, tags | Yes | Yes | Yes |
Alt text and basic edits | Yes | Varies by client | Yes |
Instagram-library music | No | No | Yes |
Effects and stickers | Limited or no | No | Yes |
Camera-based creation | No | No | Yes |
Scheduling and automation | Limited | Yes | Limited |
Desktop supports feed posts and Reels with captions, locations, tags, alt text, and basic edits, but mobile-only capabilities can include library music, advanced audio editing, effects, stickers, and camera creation as detailed in Superprofile's PC posting guide. Use desktop for original-audio or fully pre-edited video. Move the asset to mobile when licensed music, interactive stickers, or native effects are essential.
Troubleshooting the Errors That Actually Break PC Posting
Most PC publishing failures aren't mysterious. They're the same five problems wearing different error messages.
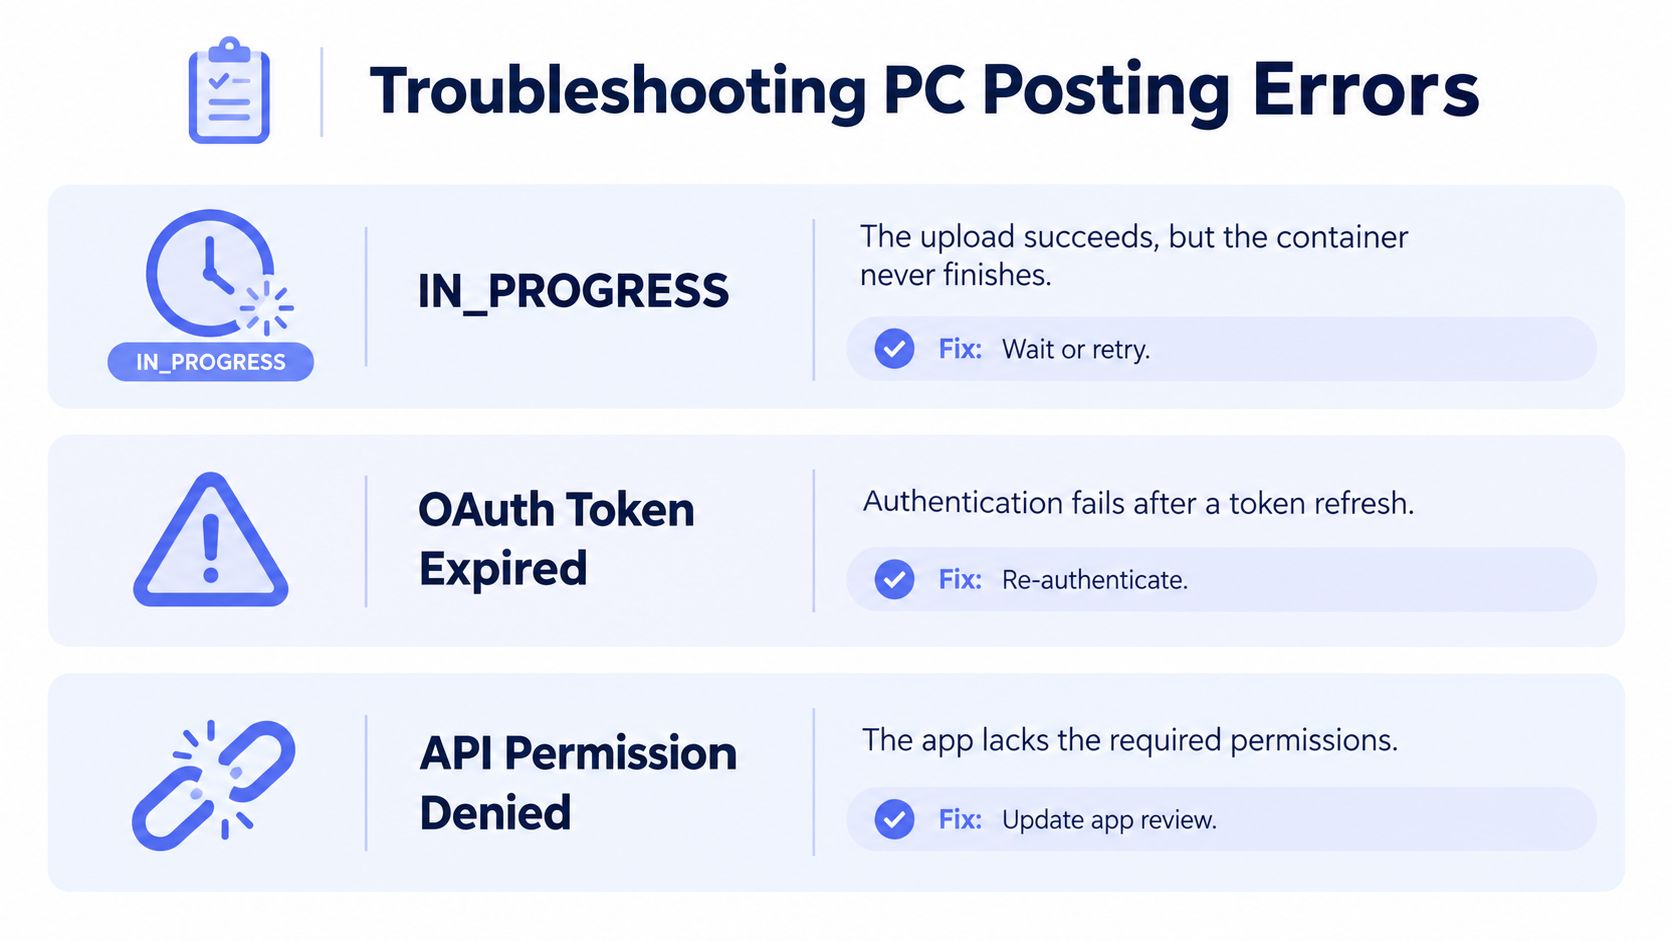 A troubleshooting guide for PC posting errors featuring status indicators and suggested fixes for common API issues.
The Five Failures You'll Actually See
Container stuck in IN_PROGRESS: Poll status until it reaches FINISHED, reuse the existing container ID, and don't hard-code a sleep or re-upload the asset.
Wrong account or missing permission: Verify the Business Portfolio, Page-to-Instagram connection, and whether the operator holds Full control or Content permission before preparing content.
Quota exhausted: Query
content_publishing_limitwith asincetimestamp no more than 24 hours old and comparequota_usageagainstquota_totalbefore publishing.Carousel cropped badly: Normalize every slide to one canvas, then check the first-slide crop and full sequence on desktop and mobile.
OAuth token expired: Short-lived Facebook Login tokens last about one to two hours, so exchange them for a 60-day long-lived token and refresh before expiry.
Decision rule: One-off manual post, use Instagram.com. Team scheduling, use Business Suite. Product integration, use the API. Multi-platform automation, use an abstraction layer.
Start by verifying your account type, permissions, and asset specs. Those three checks prevent most broken uploads, silent permission failures, and posts that only look wrong after they're live.
If your PC workflow has outgrown manual uploads and you don't want to maintain Meta OAuth, container polling, and quota logic yourself, PostPulse lets you publish to Instagram and eight other platforms through one REST API, n8n node, Make.com app, or MCP server. Connect an account, run a test post from your existing stack, and see whether removing the platform plumbing is worth more than owning it.
About the Author

Founder of PostPulse — a social media scheduling platform for creators and teams. Software engineer with a passion for building developer tools and simplifying complex API integrations across social media platforms.