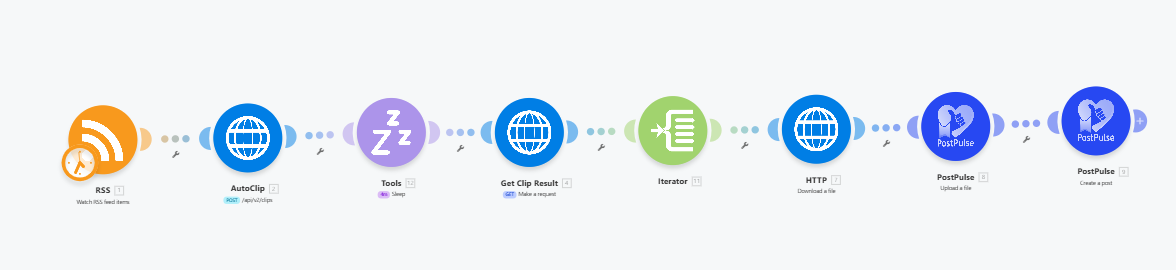
Turn YouTube Videos into YouTube Shorts in Make
Published on
Tags:
Turning long form YouTube videos into YouTube shorts is a long, time consuming process, especially once you start adding captions and changing it to the perfect aspect ratio. So in this article, we're going to show you how to turn your long form YouTube videos into YouTube shorts in just minutes, using Make and WayinVideo.
ScreenShot Tool -20260420163400Tools we'll be using for this tutorial
Make
WayinVideo
PostPulse
Step 1: Setup RSS Feed Trigger
 ScreenShot Tool -20260420171620
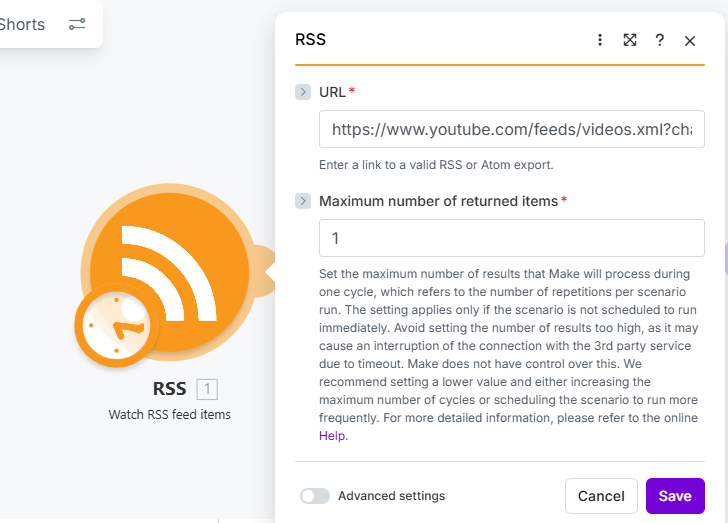
We'll kick off our workflow by using the RSS feed trigger in Make. We'll be triggering our workflow each and every time a new video from a YouTube channel is published.
Copy and paste this url to get RSS feeds from YouTube channels: https://www.youtube.com/feeds/videos.xml?channel_id=[paste channel ID here].
Step 2: Clip YouTube Videos Into Shorts With WayinVideo
 ScreenShot Tool -20260420173044
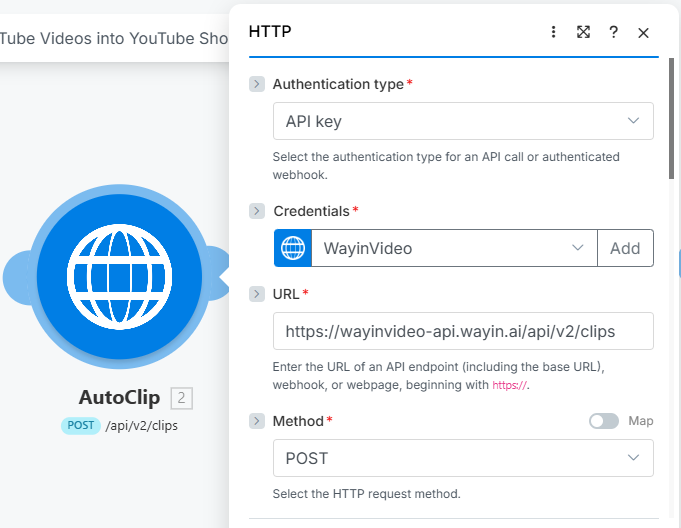
In this step, we're going to add the HTTP module to our workflow and make an API call to WayinVideo.
 ScreenShot Tool -20260420173627
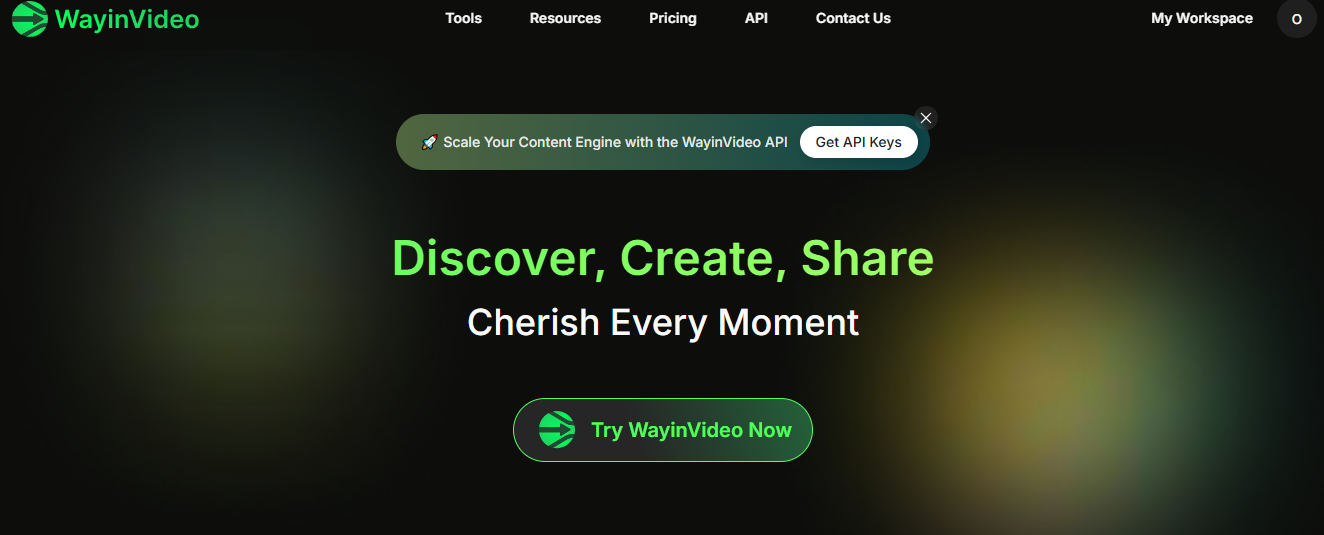
WayinVideo is an AI video editing platform that identifies the most interesting parts of a video and clips them.
 ScreenShot Tool -20260420174149
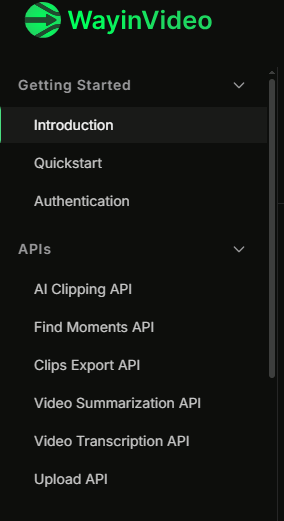
For our build, we're going to be using WayinVideo's AI Clipping API.
 ScreenShot Tool -20260420175045
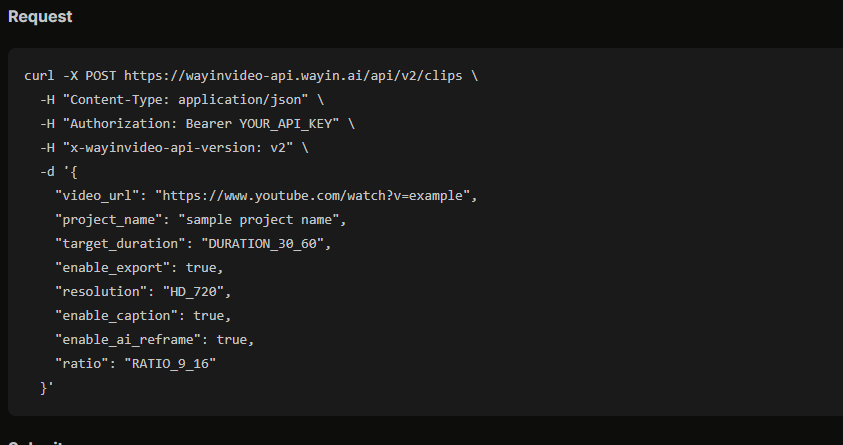
Once you've got your API key, use the Submit Clipping Task endpoint to clip the URL's we're getting from our RSS feed.
 ScreenShot Tool -20260420180047
Copy the request body above and paste it in the HTTP module. The request body is already setup perfectly, the only thing you'd need to change is the video_url field, swap it out with the url from our RSS feed.
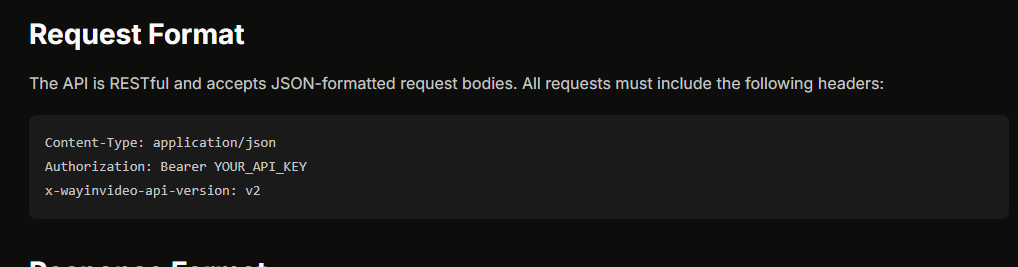
Note: When setting up your headers for WayinVideo, always use the below headers:
 ScreenShot Tool -20260420180414
Step 3: Pause Workflow
 ScreenShot Tool -20260420180939
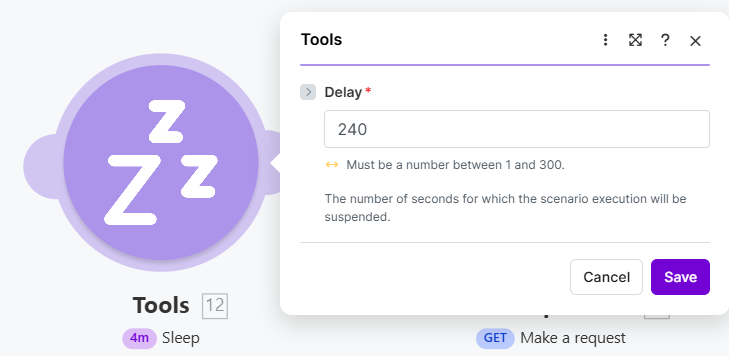
For our next step, we're going to add a sleep module to our workflow. WayinVideo has a 4-10 minutes delay when it comes to processing videos and generating clips, if we were to continue our workflow without this module, we'd hit a roadblock. So we'll use the sleep module to delay our workflow for 240 seconds (4 minutes).
Step 4: Get Clips from WayinVideo
 ScreenShot Tool -20260420182951
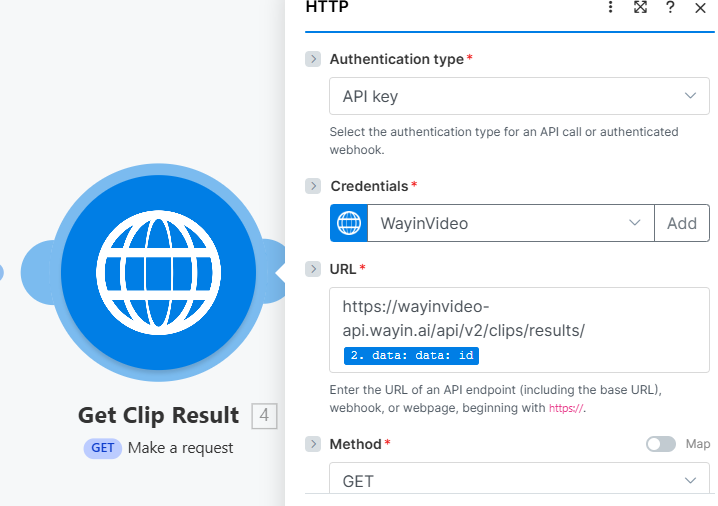
In our next step, we're going to add a second HTTP module to get our generated clips.
 ScreenShot Tool -20260420184012
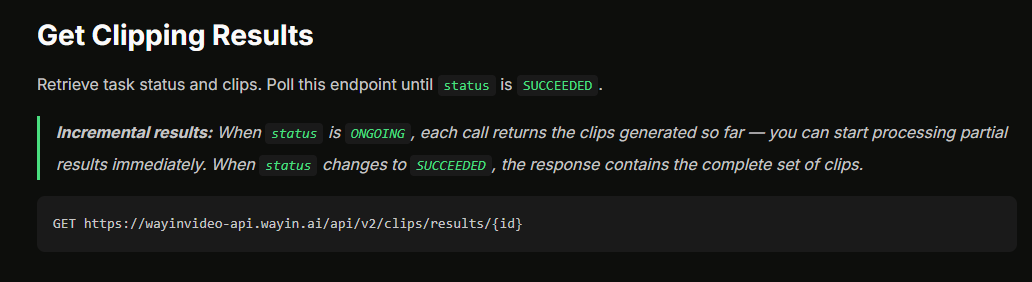
This time we'll use WayinVideo's Get Clippings Results endpoint to get our generated clips. Copy the endpoint and add the ID generated from our Submit Clipping Task output to the endpoint url. No body request is needed for this API call.
Step 5: Split Result Iterator Module
 ScreenShot Tool -20260420185258
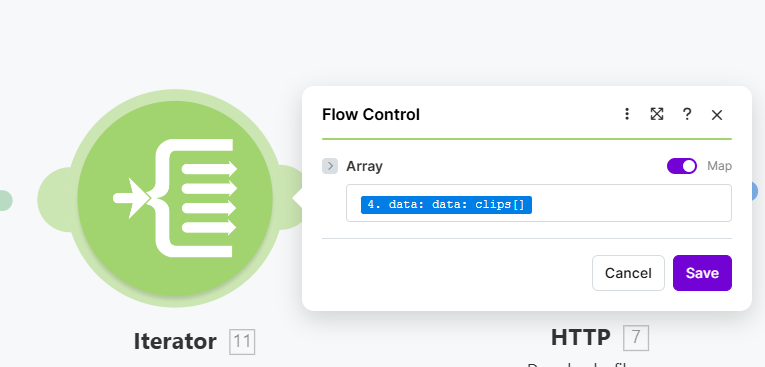
Next, we're going to add the iterator module to split out the results from the previous module. We're doing this in order to have each of our clips processed individually in our next steps.
Step 6: (Optional) Download Clips
 ScreenShot Tool -20260420190040
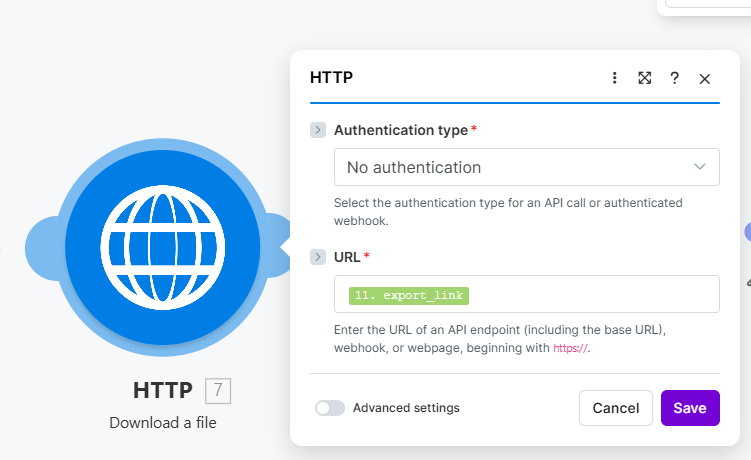
For this next step, you can add a 3rd HTTP module and download each of the generated clips.
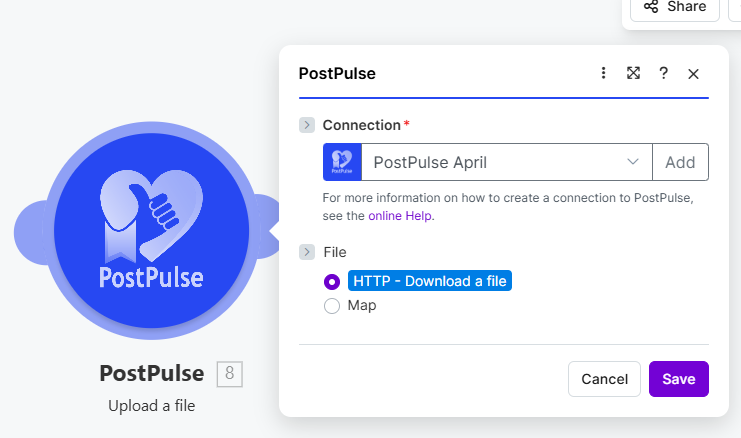
Step 7: Upload a File
 ScreenShot Tool -20260420190901
For this step, we're going to be uploading our clips to PostPulse in order to retrieve a path ID we'll be using when scheduling our clips later.
Step 8: Schedule Clips in PostPulse
 ScreenShot Tool -20260420191609
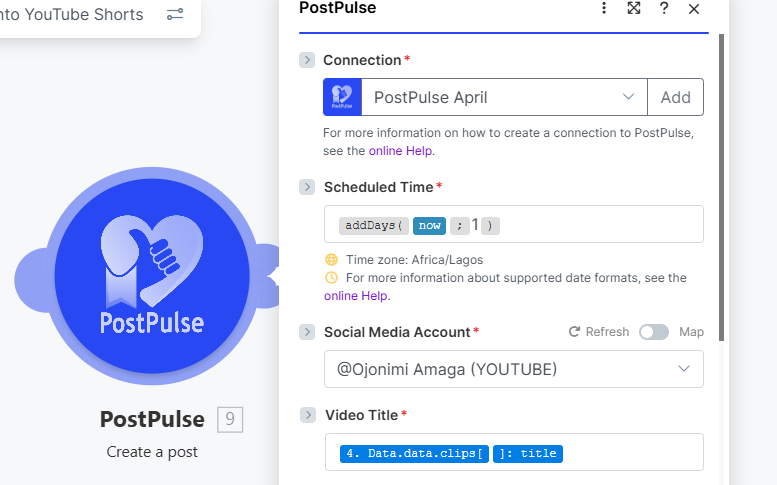
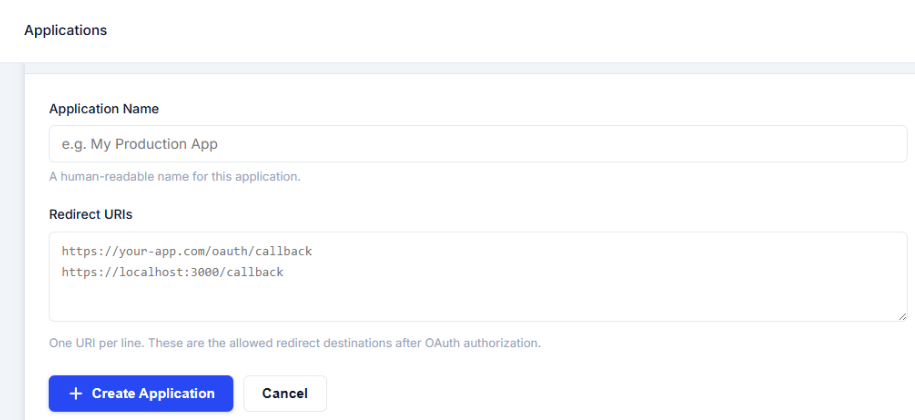
For our last step, we're going to schedule our clips in PostPulse. For this step, you’ll need a PostPulse account. Once you’ve opened up an account you can head over to the developer dashboard and Create a New App, when creating a new app, you’ll need an application name and a redirect URL for OAuth.
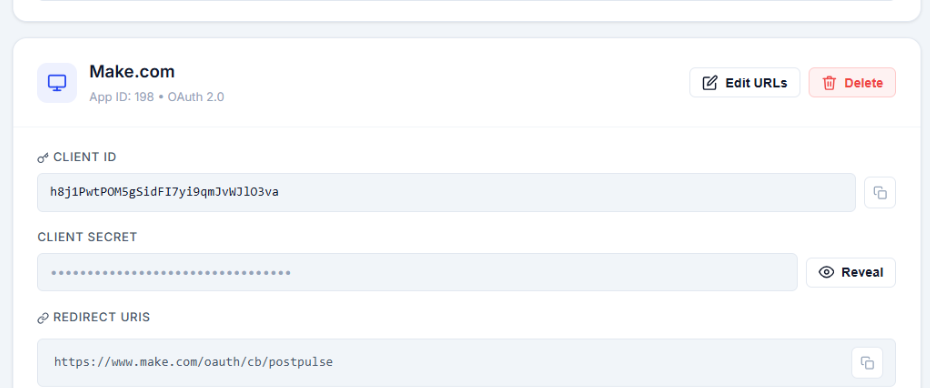
Note: Use this redirect URL for Make applications = https://www.make.com/oauth/cb/postpulse
 make-image-12
Once you’ve created an application, you’ll be given a Client ID and a Client Secret key, copy these and paste them in the PostPulse module in Make.
 make-image-09
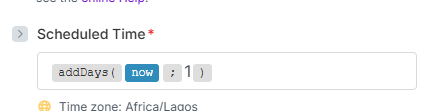
Because we want to schedule a new post everyday; In our Scheduled Time field, we’re going to add a formula.
 ScreenShot Tool -20260420193416
The formula we’ll be using is the addDays formula; this will allow us to add a day to our calculations, or in this case our schedule. So when we switch on our automation, and schedule it to run everyday, our formula is going to add an extra day each and every time our scenario runs, scheduling our next post for the next day each and every time.
 ScreenShot Tool -20260420191609
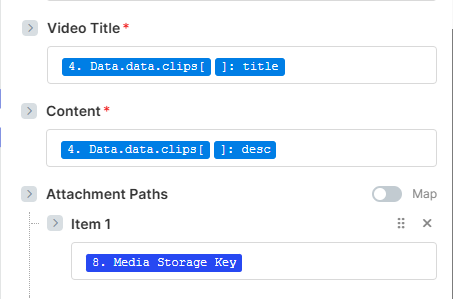
For the video title and content field we're going to use the title and description created by WayinVideo, and our attachment path is going to be the path ID we got from the previous module.
 ScreenShot Tool -20260421015550
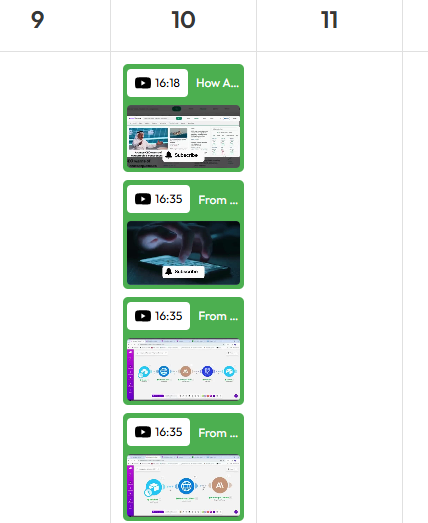
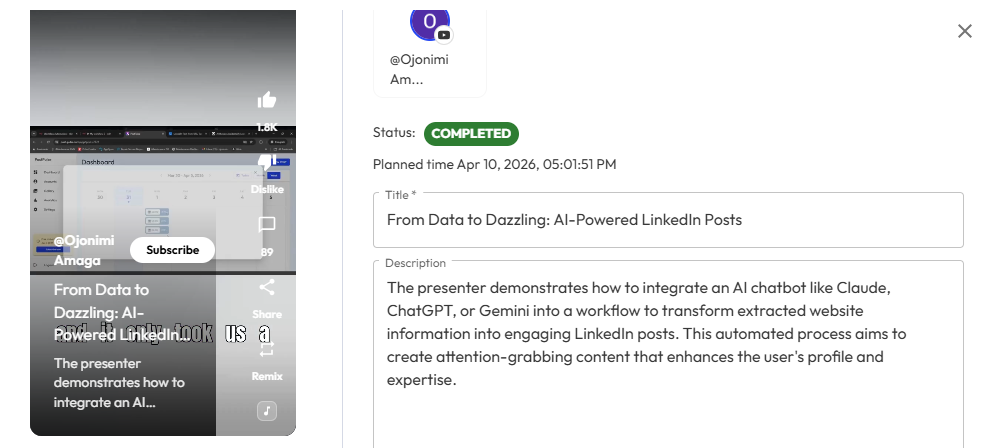
Follow these steps successfully and you’ll be able to view your scheduled short clips in your PostPulse dashboard. You can also preview your clips to get a better idea of what they’ll look like once they’re posted to YouTube.
 ScreenShot Tool -20260421015848
About the Author