Turn Web Articles Into Insightful LinkedIn Posts
Published on
Tags:
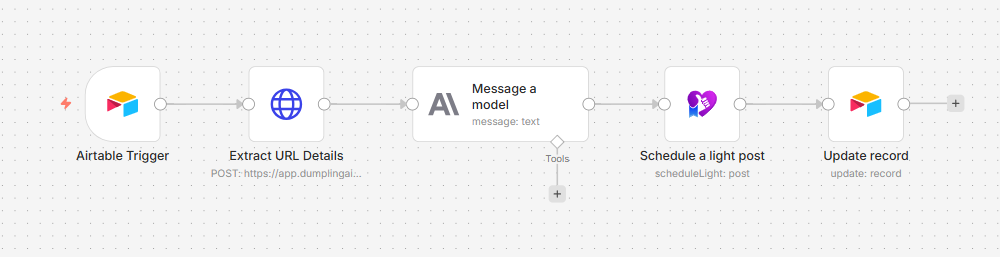
A good LinkedIn post can be the difference between a good profile and a great profile. Consistent, insightful posts can lead to new leads, but it's also time consuming. In this article, we're going to look into how to take web articles and turn them into LinkedIn posts using AI and n8n.
ScreenShot Tool -20260420223503Tools we'll be using in this tutorial
Airtable
n8n
Dumpling AI
PostPulse
Anthropic's Claude
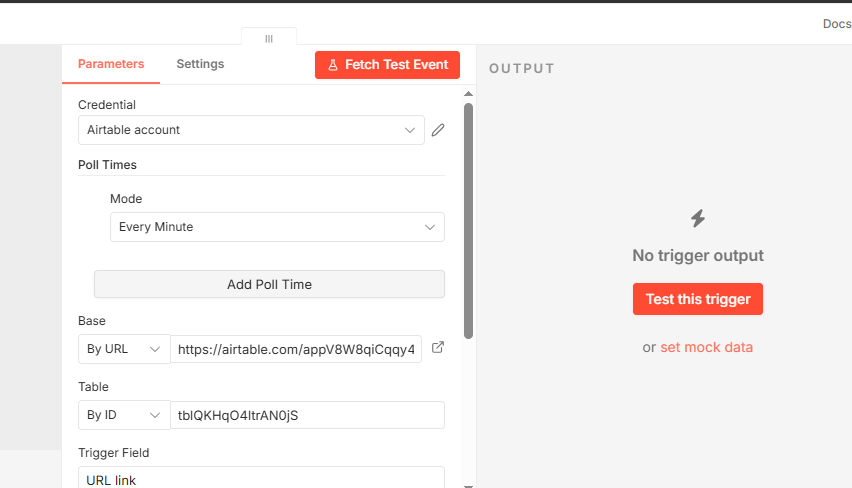
Step 1: Setup Airtable Trigger
 ScreenShot Tool -20260420231422
We’ll kick off our workflow using an Airtable trigger. In our Airtable base, we have 4 fields:
URL Link
Generated LinkedIn Post
Post Status
Created
Our trigger field is going to be the URL Link field, this is the field that contains our web article URLs.
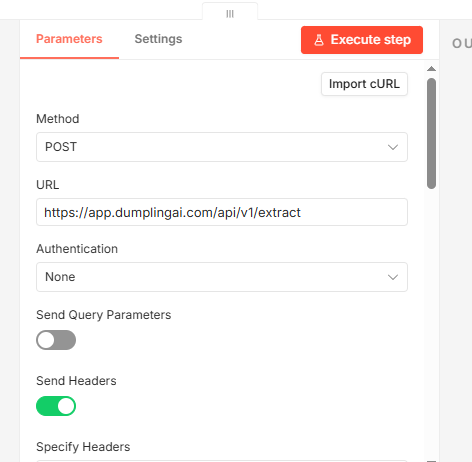
Step 2: Extract URL Content with Dumpling AI
 ScreenShot Tool -20260420231834
For our next step, we're going to extract the content of our URL. To do that, we're going to add a HTTP node to our workflow and make an API call to Dumpling AI's extract endpoint.
Step 3: Generate LinkedIn Post with Anthropic's Claude
 ScreenShot Tool -20260420231834
In this step, we’re going to add the Claude node to our workflow and use it to generate our content. We're going to be taking the extracted content from our previous node and turn it into an attention grabbing post for LinkedIn. We’re using Anthropic's Claude module for the purpose of this demonstration, but for your build, you can use any chat model of your choice, like ChatGPT, Gemini or Grok.
Step 4: Schedule Post in PostPulse
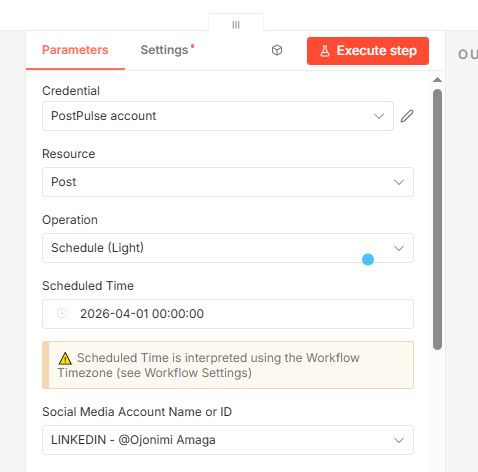 ScreenShot Tool -20260420232908 (1)
In this step, we’re going to schedule our generated LinkedIn posts to our respective LinkedIn account. To do this, we’re going to use the PostPulse node in n8n.
For this step, you’ll need a PostPulse account. Once you’ve opened up an account you can head over to the developer dashboard and Create a New App, when creating a new app, you’ll need an application name and a redirect URL for OAuth.
You can find the correct Redirect URL directly inside the PostPulse node:
Click the PostPulse node to open its settings panel.
In the Parameters section, locate the field called “Credential to connect with.”
Click Edit (or create a New Credential if you haven't created one yet).
In the credential configuration window, you will see a field labeled: OAuth Redirect URL.
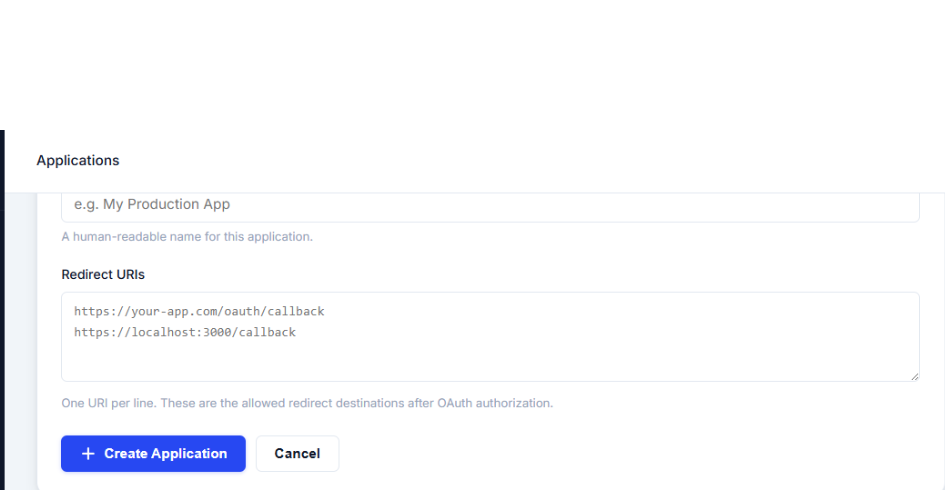 n8n-image-13
Once you’ve created an application, you’ll be given a Client ID and a Client Secret key, copy these and paste them in the PostPulse module in n8n.
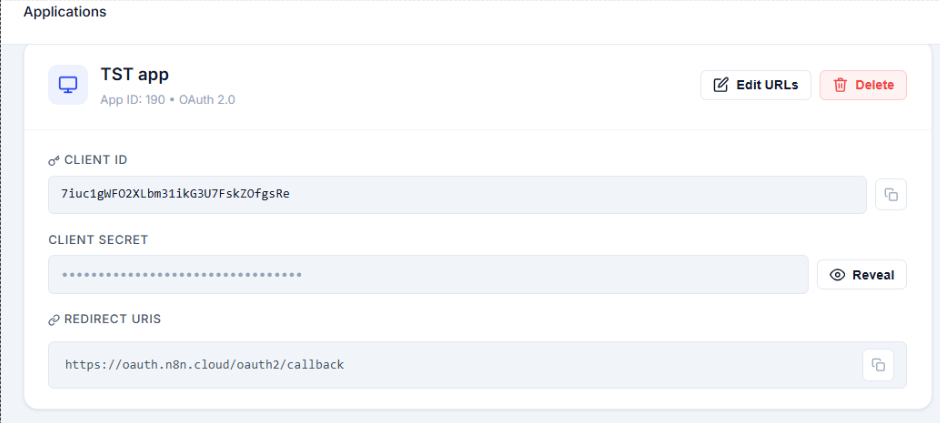 n8n-image-14
Once you’ve done that all we’ll need to do is select our LinkedIn account, map out our Claude output as our content, and set up the date we want our post to go out. Because we want to schedule a new post everyday, we’re going to add a JSON expression in our Scheduled Time field.
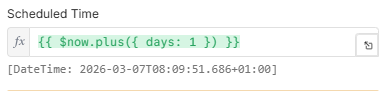 n8n-image-02
The expression we’re using is going to set our scheduled date to whatever is the current time our scenario will run. Once it does that, it will also add an extra day to our workflow. So once we schedule our workflow to run everyday, it’ll set the schedule date to that moment, and add an extra day, scheduling our posts one day in advance.
Step 5: Update Airtable Record
 ScreenShot Tool -20260420234456
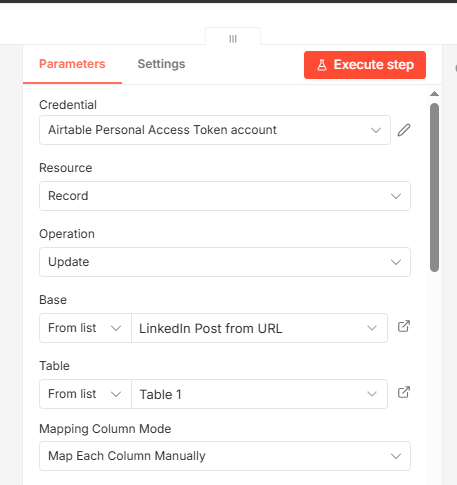
The last thing we're going to do is add a second Airtable node, but this time we're going to update our record, and this is where we'll update the status of our Post Status from No to Yes, and we're going to add our generated LinkedIn post to Airtable, letting us know that our workflow has been successful and our post has been scheduled in PostPulse.
Follow these steps successfully and you’ll be able to view your scheduled posts in your PostPulse dashboard. If you’re interested in this automation, you can find a copy of this workflow below and use it as a template.
About the Author