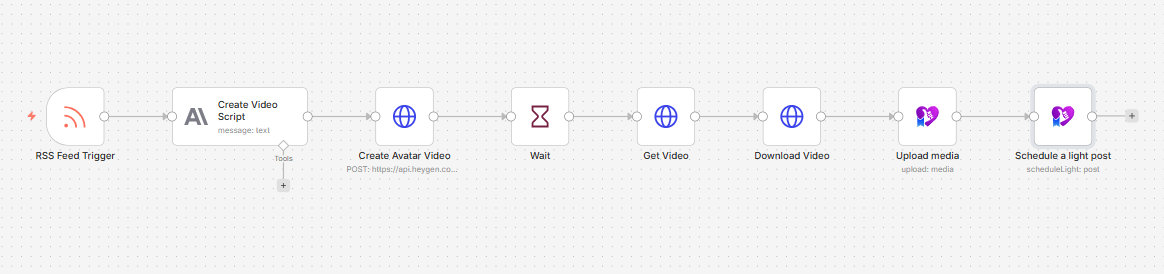
Turn RSS Feed Into AI Avatar Video in n8n: HeyGen + n8n + Claude + PostPulse
Published on
Tags:
Creating video content every single week is not for the faint of heart; from finding content idea, camera setup, reshoots and edits, it's a time consuming endeavor. The good news is, there's a quicker way to do this; in this article, we're going to show you how to generate content with AI avatars , using n8n and HeyGen.
Tools we'll be using in this tutorial:
n8n
HeyGen
PostPulse
Anthropic's Claude
Step 1: Setup RSS Feed Trigger
 ScreenShot Tool -20260515080628
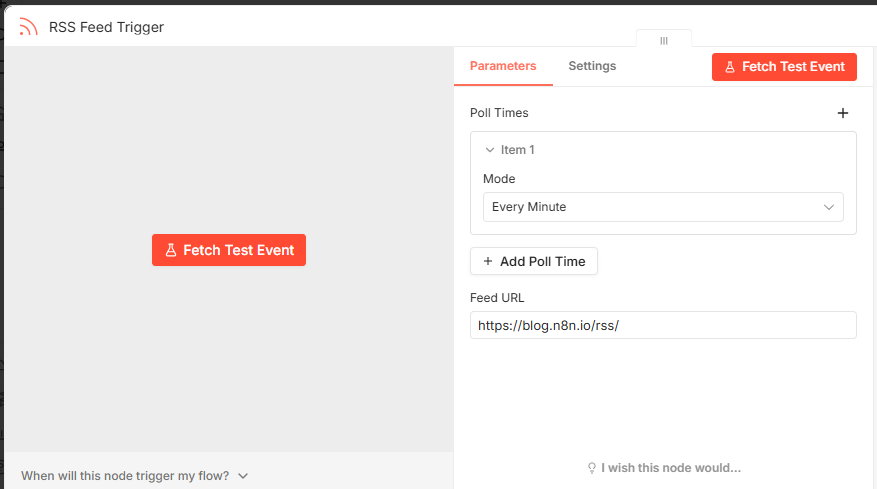
We're going to setup our trigger by using the RSS feed trigger node. We're going to be waiting for data from a website that will include its description and summary, once we get that data, our workflow will kick off.
Step 2: Create Video Script with Claude
 ScreenShot Tool -20260515081347
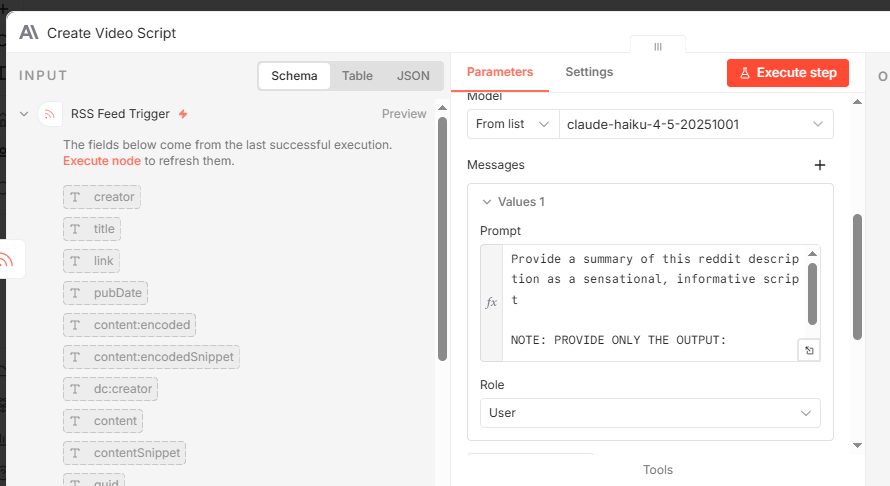
We're going to take the results from our RSS feed trigger, and use the Anthropic Claude node to create a short, informative script for HeyGen.
Note: You can use any Claude model of your choice, in our demonstration, we used the Haiku model, for more precise and longer scripts, the Sonnet model is recommended.
Step 3: Create HeyGen Video via API
 ScreenShot Tool -20260515082017
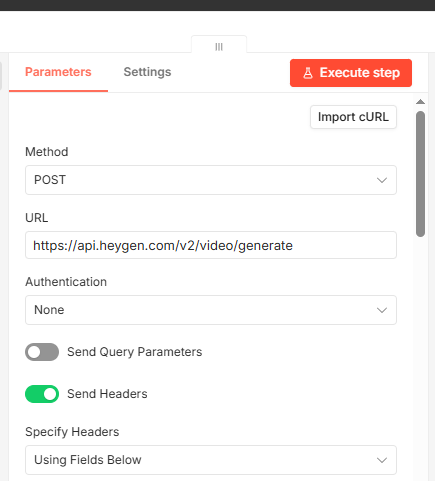
In this step, we're going to add the HTTP node to our workflow and make an API call to HeyGen's create a video endpoint. We're making our call to the v2 version of the endpoint.
 ScreenShot Tool -20260515082444
We're going to add two headers to our call. Those are going to be the x-api-key, and our content-type.
 ScreenShot Tool -20260515083013
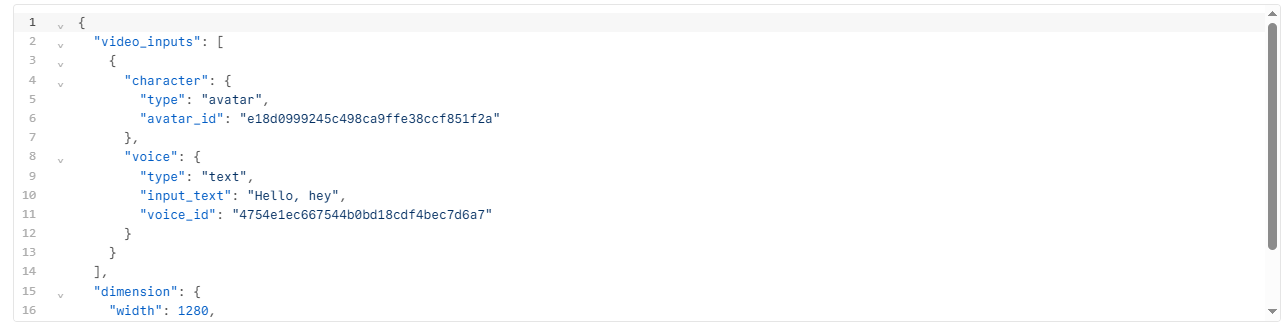
Our API body is going to be the JSON body above. Add the script generated by Claude by mapping it to the input_text field.
Note: You can find your avatar ID and Voice ID in your HeyGen dashboard.
Step 4: Add Wait Node to Pause Workflow
 ScreenShot Tool -20260515085407
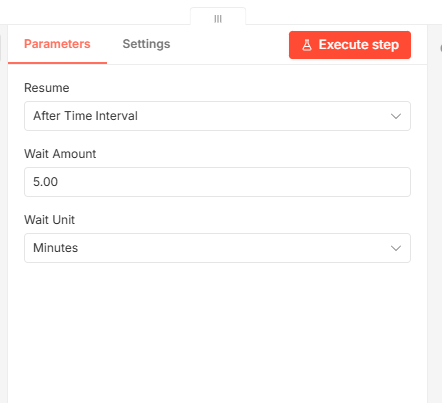
While our HeyGen API call is creating our video, this process usually takes 4-5 minutes, so we're going to add the wait node to our workflow with a 5 minute delay, pausing out workflow for 5 minutes before proceeding to the next step.
Step 5: Get HeyGen Video with HTTP Node
 ScreenShot Tool -20260515085953
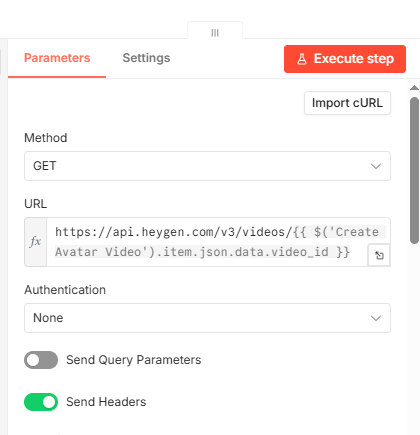
In this step we're going add another HTTP node and make another API call to HeyGen, except to the get video endpoint. We're using this node to get the results of our generated video from step 3.
Note: API headers are the same as step 3.
Step 6: Download Generated Video
 ScreenShot Tool -20260515090528
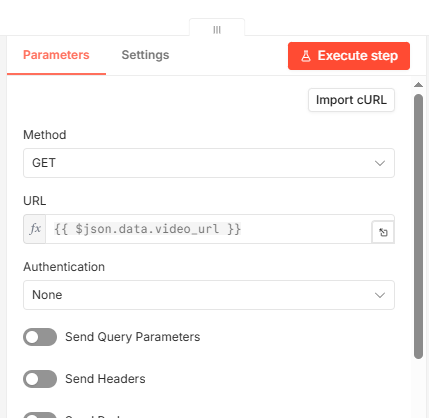
In this step, we're going to download our generated HeyGen video by adding a third HTTP node and downloading our video URL from step 5
Step 7: Upload Media to PostPulse
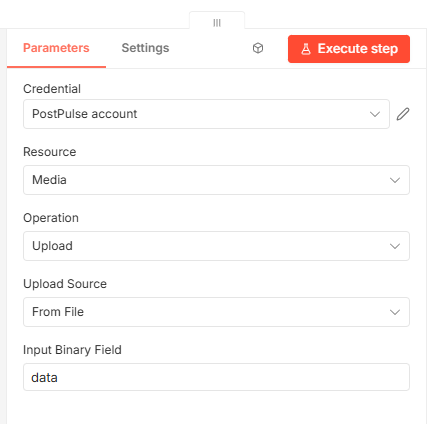 ScreenShot Tool -20260515091253
In this step, we'll add the PostPulse node and use the upload media action to upload our generated video to PostPulse, receiving a path ID we'll be using later.
Step 8: Schedule in PostPulse
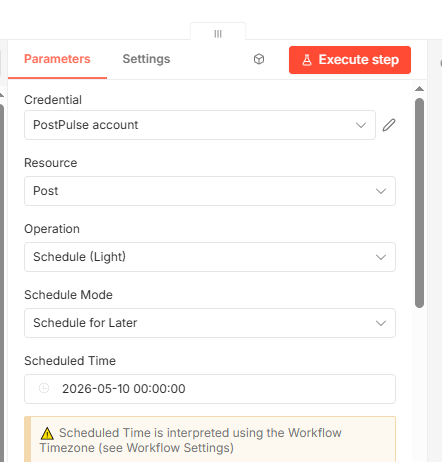 ScreenShot Tool -20260515092031
For our last step, we're going to schedule our generated video in PostPulse.
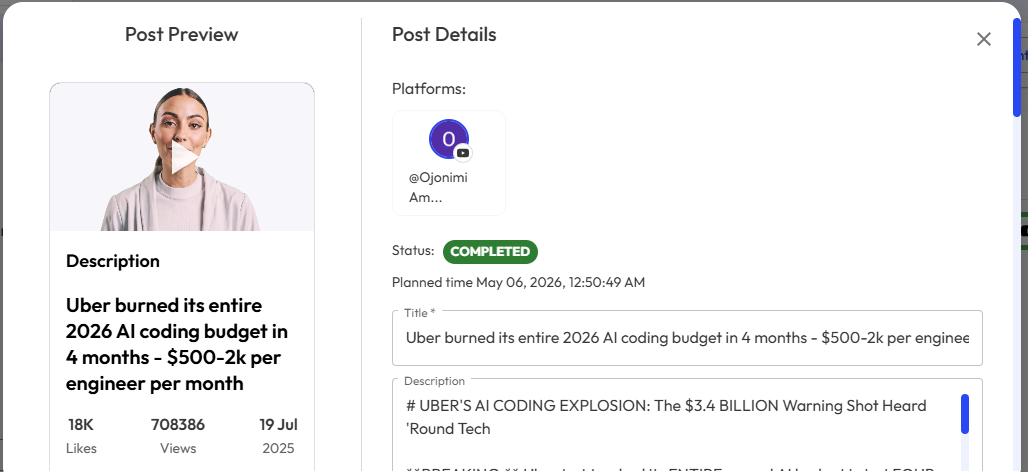 ScreenShot Tool -20260515093813
Follow these steps successfully and you’ll be able to view your scheduled AI avatar video in your PostPulse dashboard. You can also preview your video to get a better idea of what they’ll look like once they’ve been posted.
About the Author