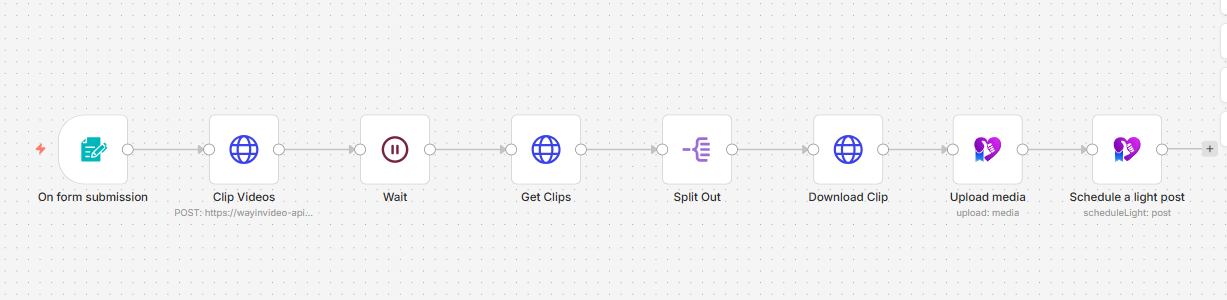
Turn Podcast Clips into TikTok Shorts: WayinVideo + n8n + PostPulse
Published on
Tags:
Taking clips from podcasts and sharing them on TikTok is one of the easiest way to get consistently high views, and it's quite easy. The only thing hard about it is the actual editing and clipping of the podcast videos. In this article, we're going to show you how to build an automation in n8n that creates viral TikTok shorts from podcast clips using AI.
ScreenShot Tool -20260421000731Tools we'll be using in this tutorial
n8n
WayinVideo
PostPulse
Step 1: Setup Form Trigger
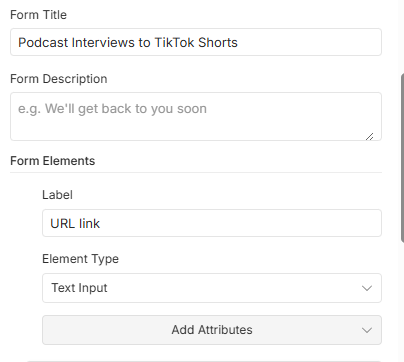 ScreenShot Tool -20260421001743
We're going to start our workflow by setting up an n8n form trigger. The only field this form will have is the URL link field, which is where our workflow will get the URL of the podcast clip we'll be clipping. Once it gets that, our workflow will begin.
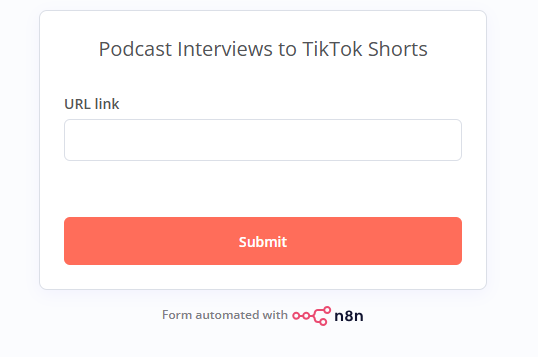 ScreenShot Tool -20260421002300
Step 2: Turn Podcast Clip into TikTok Friendly Shorts
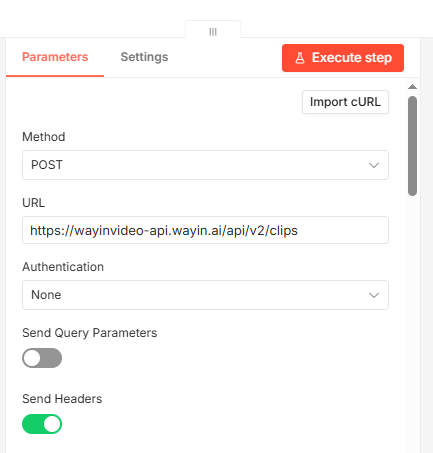 ScreenShot Tool -20260421010853
In this step, we're going to add the HTTP module to our workflow and make an API call to WayinVideo.
 ScreenShot Tool -20260420173627
WayinVideo is an AI video editing platform that identifies the most interesting parts of a video and clips them.
 ScreenShot Tool -20260420174149
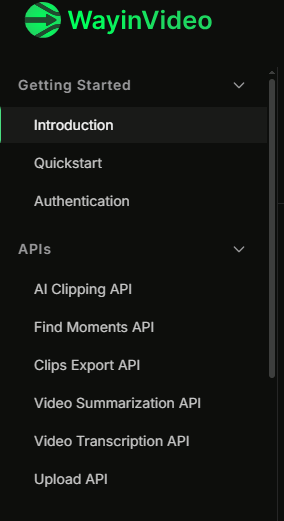
For our build, we're going to be using WayinVideo's AI Clipping API.
 ScreenShot Tool -20260420175045
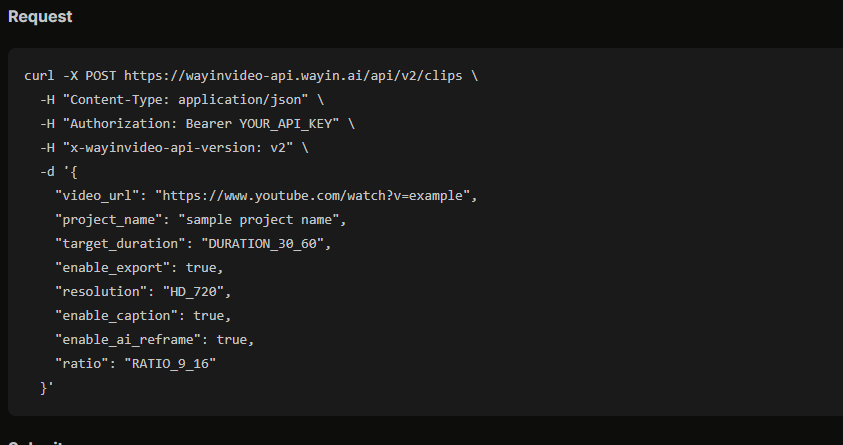
Once you've got your API key, use the Submit Clipping Task endpoint to clip the URL's we're getting from our n8n form.
 ScreenShot Tool -20260420180047
Copy the request body above and paste it in the HTTP node. The request body is already setup perfectly, the only thing you'd need to change is the video_url field, swap it out with the url from our n8n form.
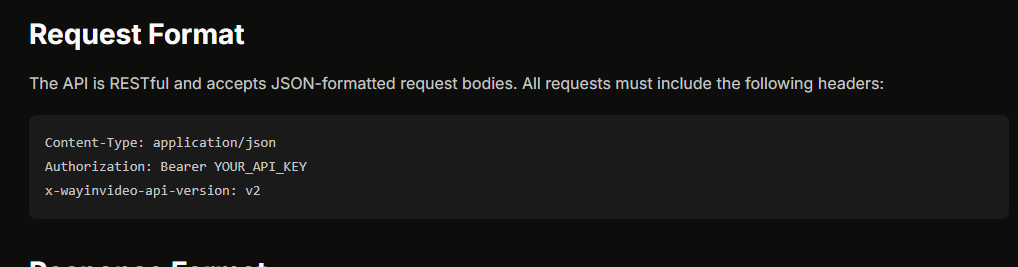
Note: When setting up your headers for WayinVideo, always use the below headers:
 ScreenShot Tool -20260420180414
Step 3: Pause Workflow
 ScreenShot Tool -20260421012030
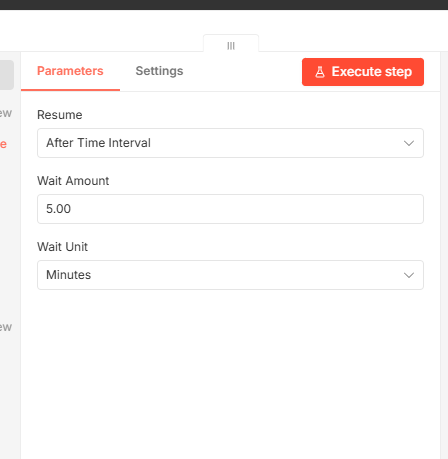
For our next step, we're going to add a wait node to our workflow. WayinVideo has a 4-10 minutes delay when it comes to processing videos and generating clips, if we were to continue our workflow without this module, we'd hit a roadblock. So we'll use the sleep module to delay our workflow for 5 minutes.
Step 4: Get Clips from WayinVideo
 ScreenShot Tool -20260421012433
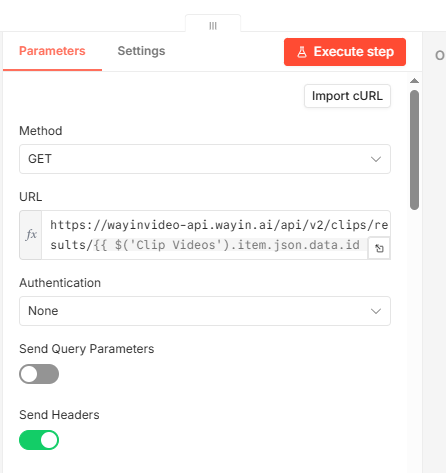
In our next step, we're going to add a second HTTP node to get our generated clips.
 ScreenShot Tool -20260420184012
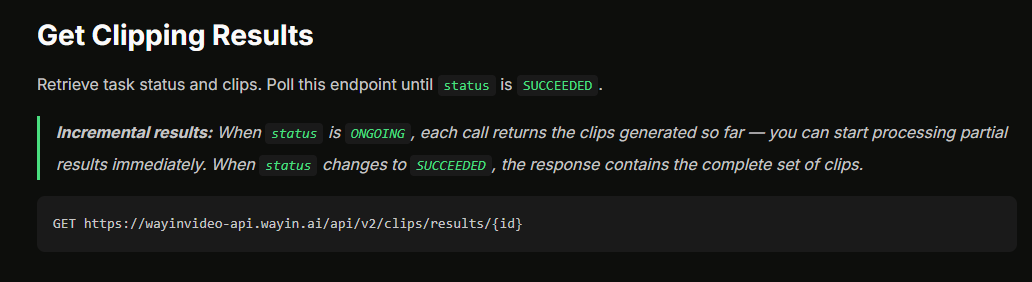
This time we'll use WayinVideo's Get Clippings Results endpoint to get our generated clips. Copy the endpoint and add the ID generated from our Submit Clipping Task output to the endpoint url. No body request is needed for this API call.
Step 5: Add Split Out Node
 ScreenShot Tool -20260421012813
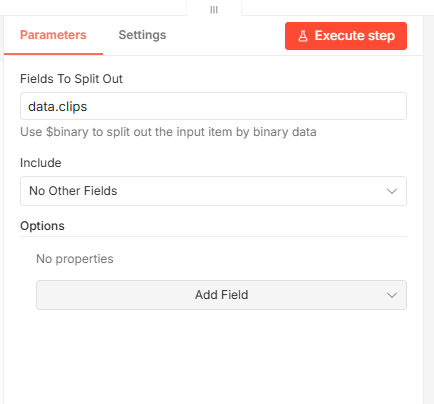
Next, we're going to add the split out node to split out the results from the previous node. We're doing this in order to have each of our clips processed individually in our next steps.
Step 6: Download Clip
 ScreenShot Tool -20260421013154
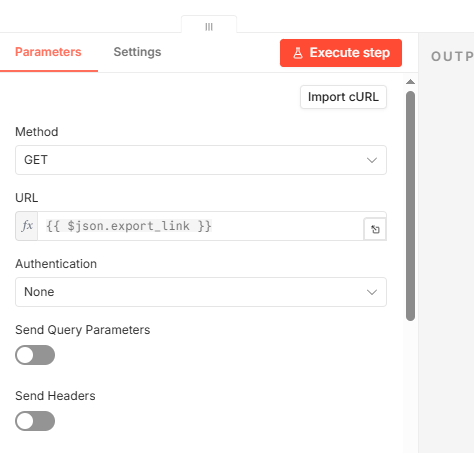
For this next step, you can add a 3rd HTTP node and download each of the generated clips.
Step 7: Upload Media
 ScreenShot Tool -20260421013525
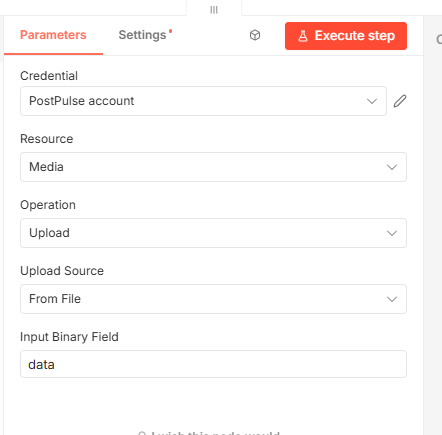
In this step, we'll upload our clips to PostPulse in order to retrieve a path ID we'll be using when scheduling our clips later.
Step 8: Schedule Clips in PostPulse
 ScreenShot Tool -20260421013817
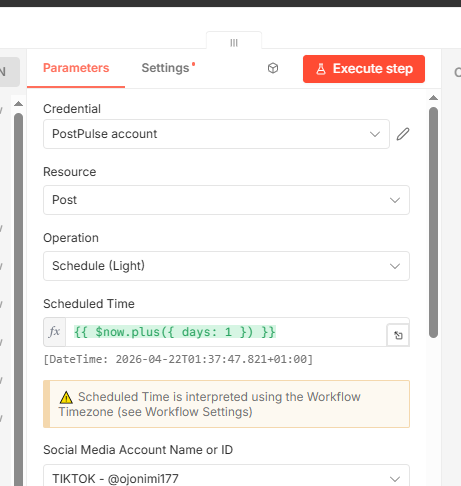
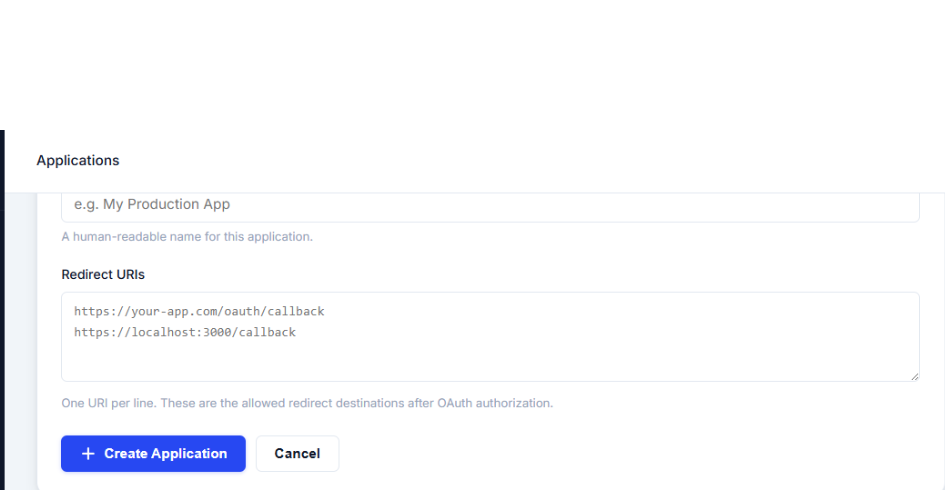
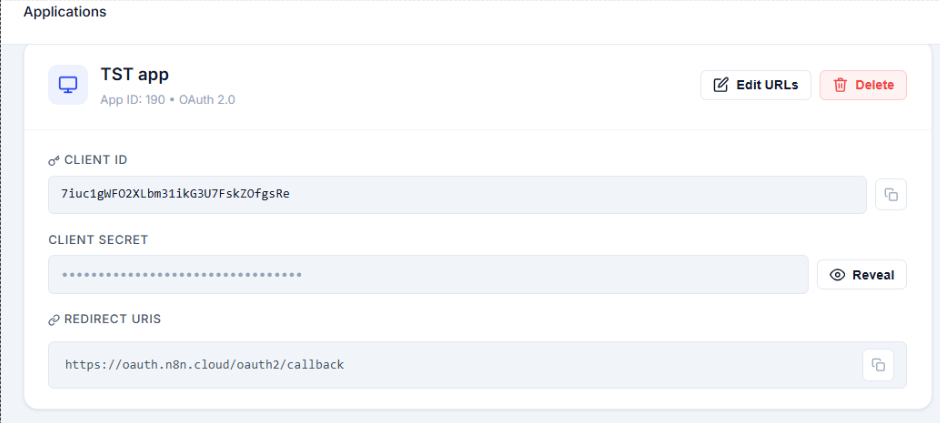
For our last step, we're going to schedule our clips in PostPulse. For this step, you’ll need a PostPulse account. Once you’ve opened up an account you can head over to the developer dashboard and Create a New App, when creating a new app, you’ll need an application name and a redirect URL for OAuth.
You can find the correct Redirect URL directly inside the PostPulse node:
Click the PostPulse node to open its settings panel.
In the Parameters section, locate the field called “Credential to connect with.”
Click Edit (or create a New Credential if you haven't created one yet).
In the credential configuration window, you will see a field labeled: OAuth Redirect URL.
 n8n-image-13
Once you’ve created an application, you’ll be given a Client ID and a Client Secret key, copy these and paste them in the PostPulse node in n8n.
 n8n-image-14
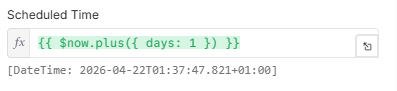
In n8n, we're going to set our schedule time and date. Because we want to schedule a new post everyday; In our Scheduled Time field, we’re going to add a JSON expression.
 ScreenShot Tool -20260421014537
The expression we’re using is going to set our scheduled date to whatever is the current time our scenario will run. Once it does that, it will also add an extra day to our workflow. So once we schedule our workflow to run everyday, it’ll set the schedule date to that moment, and add an extra day, scheduling our posts one day in advance.
 ScreenShot Tool -20260421014953
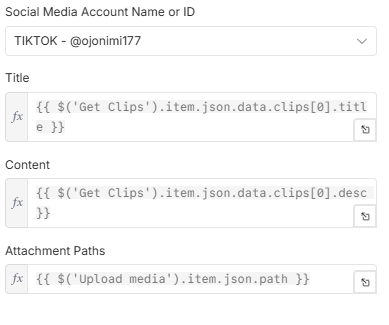
We're going to select our TikTok page as our social media channel of choice. For the video title and content field we're going to use the title and description created by WayinVideo, and our attachment path is going to be the path ID we got from the previous node.
 ScreenShot Tool -20260420194232
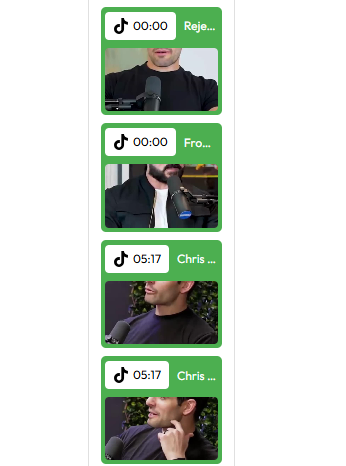
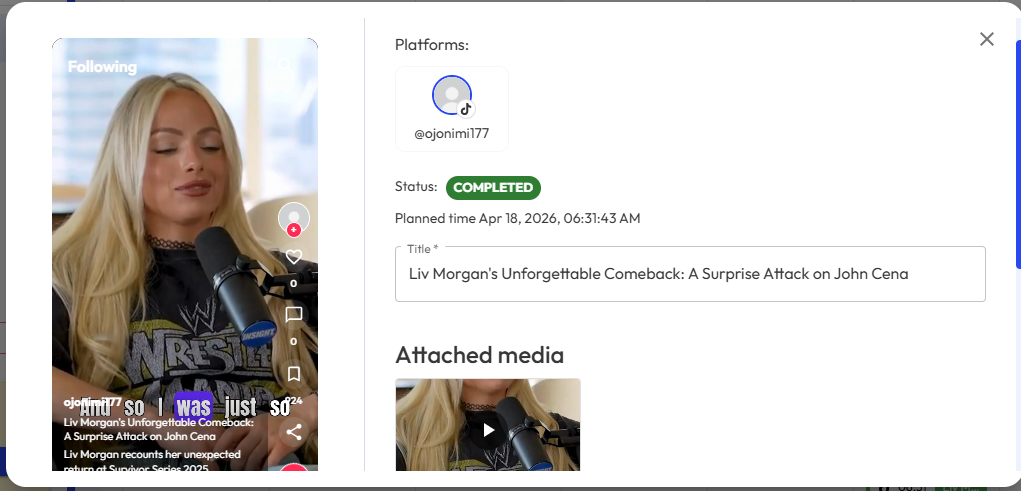
Follow these steps successfully and you’ll be able to view your scheduled short clips in your PostPulse dashboard. You can also preview your clips to get a better idea of what they’ll look like once they’re posted to your TikTok page.
 ScreenShot Tool -20260420194626
About the Author