X (Twitter) Media Upload: The Chunked INIT → APPEND → FINALIZE Flow
Published on
Tags:
X (Twitter) Media Upload: The Chunked INIT → APPEND → FINALIZE Flow
You want to post a video to X via the API. You'd expect a single upload endpoint. Instead, you get a three-step chunked protocol with processing delays, 4.5MB segment limits, and a polling loop. Images are easier — but still not a simple POST.
The Problem
X (formerly Twitter) has two completely different upload flows depending on your media type:
Images — a straightforward multipart POST to a single endpoint. Relatively painless.
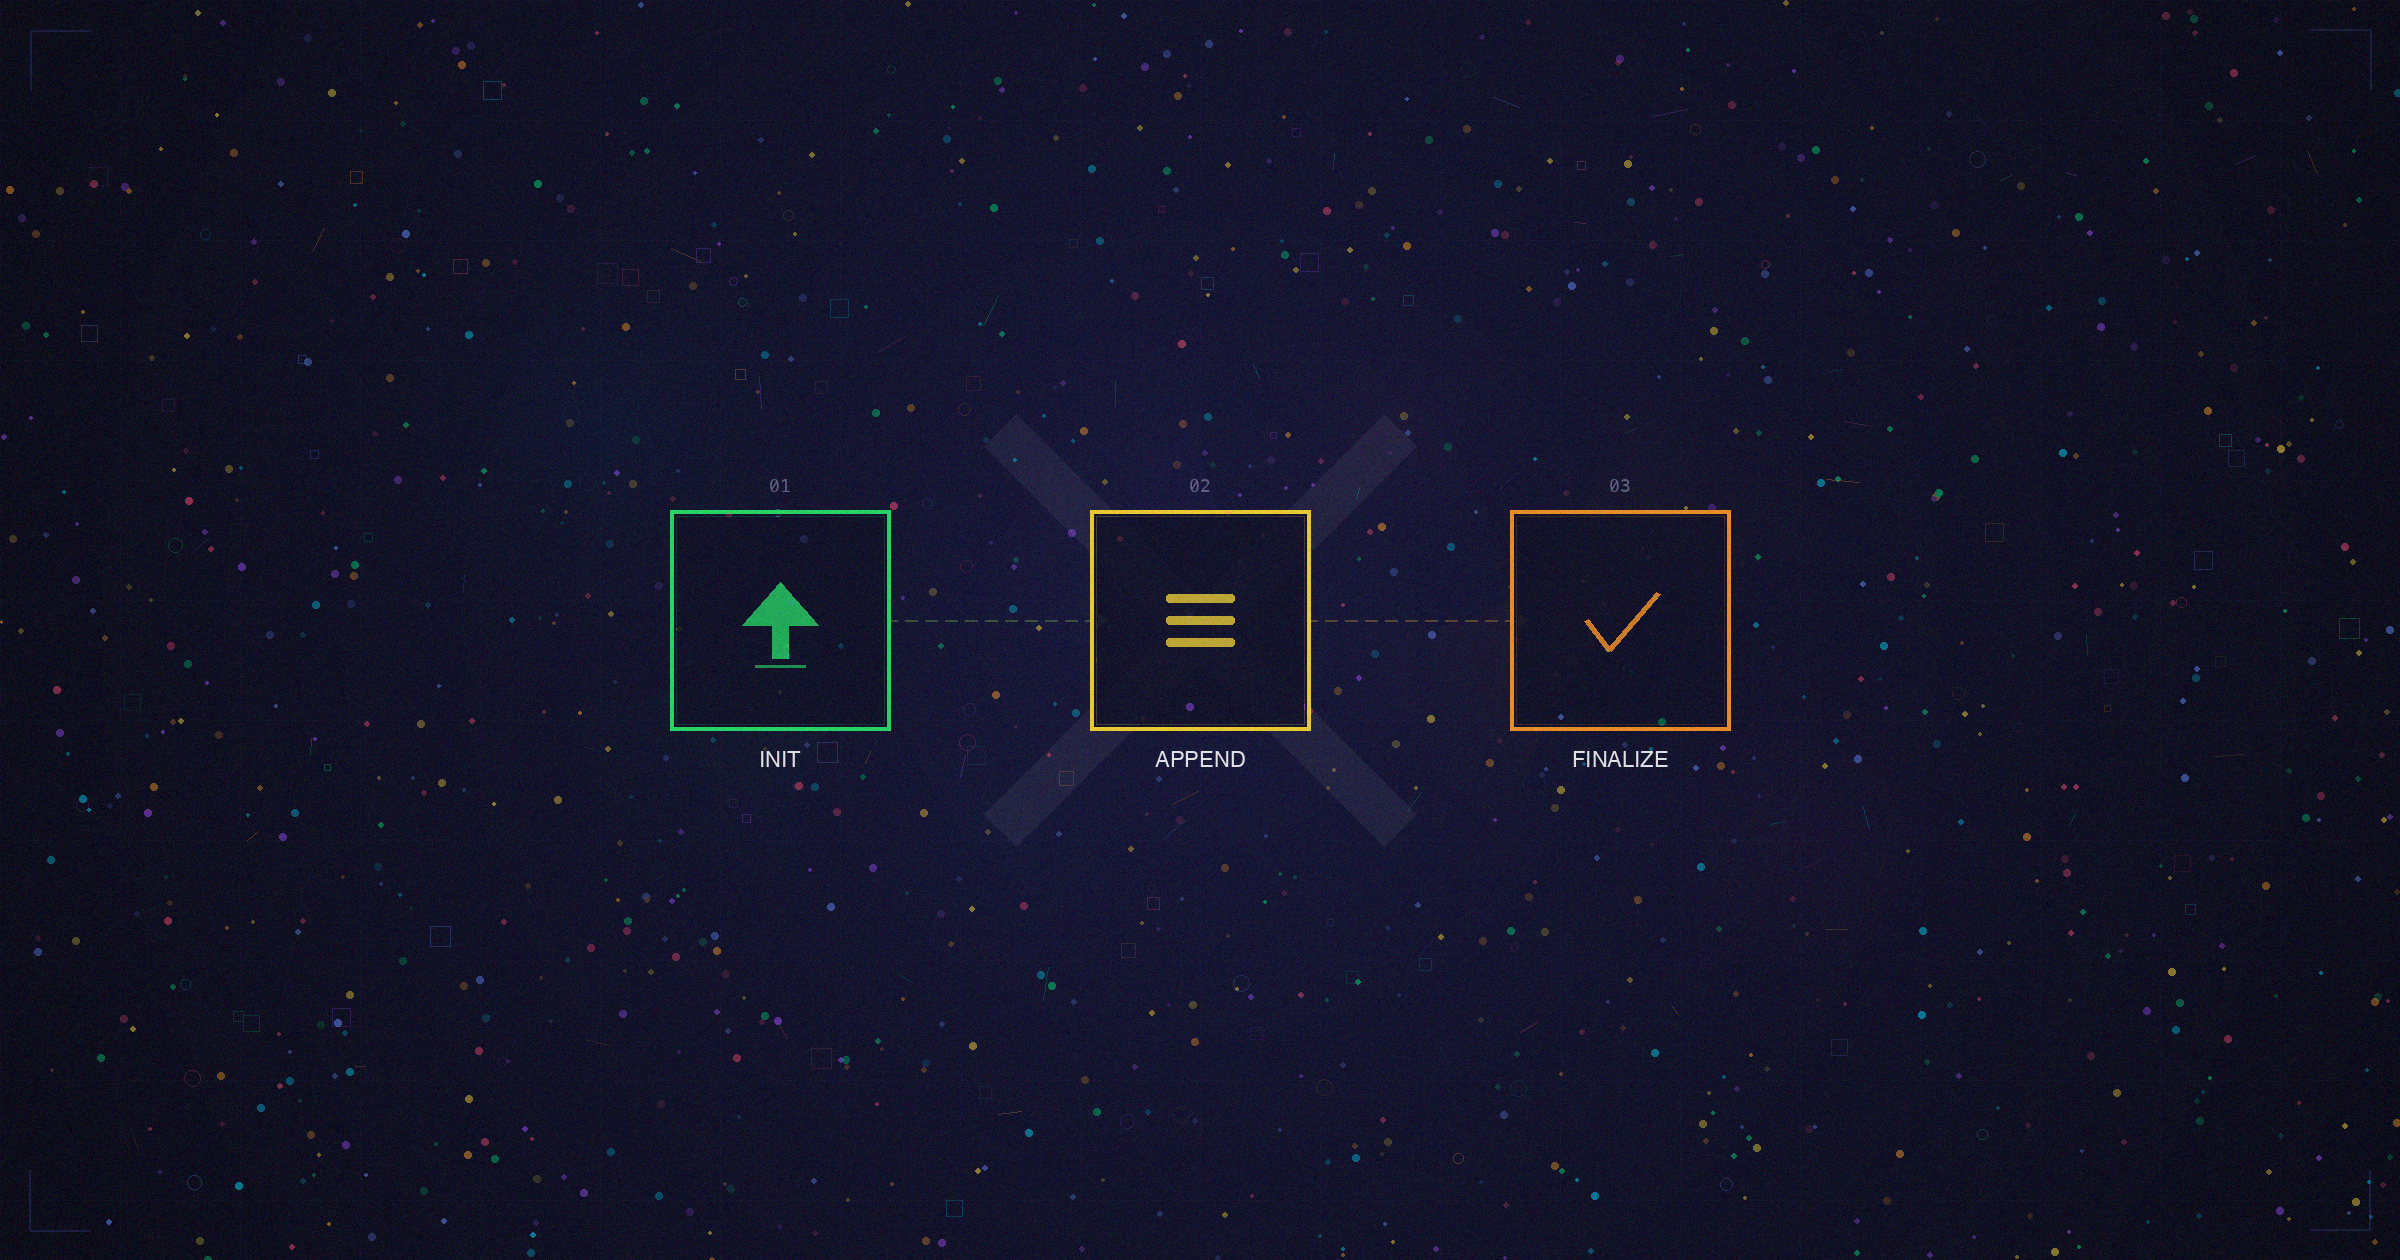
Videos — a three-phase chunked upload: INIT (reserve a media slot), APPEND (push binary chunks), FINALIZE (tell X you're done). Then you wait. X needs to process the video before you can attach it to a tweet.
Most tutorials only cover the image case. When developers try to post a video the same way, it fails silently or throws cryptic errors. The chunked flow isn't hard once you understand it, but discovering that you need it — and getting the chunk sizing right — is where everyone loses time.
On top of that, the auth model is a hybrid: OAuth 2.0 with PKCE for the authorization flow, but Basic auth (Base64-encoded client credentials) for the token exchange. That trips people up too.
Let's walk through both upload paths and the tweet creation that ties it all together.
Prerequisites
An X Developer App registered at developer.x.com
OAuth 2.0 credentials:
client_idandclient_secretA valid access token obtained via OAuth 2.0 with PKCE (we'll cover the token exchange below)
Required scopes:
tweet.read,tweet.write,users.read,offline.accessImages: JPEG, PNG, GIF, or WEBP
Videos: MP4, up to 512MB
X OAuth 2.0: The Basic Auth Surprise
X uses OAuth 2.0 with PKCE for user authorization, but the token exchange endpoint requires Basic auth — not Bearer. This is the part that catches developers off guard.
Step 1 — Build the Authorization URL
Direct the user to X's authorization page:
https://twitter.com/i/oauth2/authorize
  ?response_type=code
  &client_id={your_client_id}
  &redirect_uri={your_redirect_uri}
  &scope=tweet.read tweet.write users.read offline.access
  &state={random_state}
  &code_challenge={code_challenge}
  &code_challenge_method=S256
Generate the PKCE code_verifier (a random string) and derive the code_challenge from it using SHA-256 + Base64URL encoding. After the user approves, X redirects to your redirect_uri with a code parameter.
Step 2 — Exchange the Code for Tokens
Here's where Basic auth comes in. Base64-encode your client_id:client_secret pair:
curl -X POST "https://api.x.com/2/oauth2/token" \
  -H "Authorization: Basic {base64(client_id:client_secret)}" \
  -H "Content-Type: application/x-www-form-urlencoded" \
  -d "code={authorization_code}" \
  -d "grant_type=authorization_code" \
  -d "redirect_uri={your_redirect_uri}" \
  -d "code_verifier={code_verifier}"
Response:
{
  "token_type": "bearer",
  "access_token": "xxxxxxxxxxxxxxxxx",
  "expires_in": 7200,
  "refresh_token": "xxxxxxxxxxxxxxxxx",
  "scope": "tweet.read tweet.write users.read offline.access"
}
The access token lasts about 2 hours. The refresh token doesn't have a fixed expiry but rotates on every use — always store the new one.
Step 3 — Refresh When Expired
curl -X POST "https://api.x.com/2/oauth2/token" \
  -H "Authorization: Basic {base64(client_id:client_secret)}" \
  -H "Content-Type: application/x-www-form-urlencoded" \
  -d "grant_type=refresh_token" \
  -d "refresh_token={refresh_token}"
Critical: The refresh response includes a new refresh token. The old one is immediately invalidated. If you fail to store the new refresh token, the user will need to re-authorize from scratch.
Step-by-Step: Uploading an Image
Images use a single multipart POST. No chunking, no polling — just upload and get a media ID back.
Step 1 — Upload the Image
curl -X POST "https://api.x.com/2/media/upload" \
  -H "Authorization: Bearer {access_token}" \
  -F "media=@/path/to/image.jpg" \
  -F "media_category=tweet_image" \
  -F "media_type=image/jpeg"
Response:
{
  "id": "1234567890123456789"
}
That id is your media ID. Hold onto it — you'll reference it when creating the tweet.
Step 2 — Create a Tweet with the Image
curl -X POST "https://api.x.com/2/tweets" \
  -H "Authorization: Bearer {access_token}" \
  -H "Content-Type: application/json" \
  -d '{
    "text": "Check out this photo!",
    "media": {
      "media_ids": ["1234567890123456789"]
    }
  }'
Response:
{
  "data": {
    "id": "1234567890123456790",
    "text": "Check out this photo!"
  }
}
That's it for images. Videos are where things get interesting.
Step-by-Step: Uploading a Video (The Chunked Flow)
Video uploads follow a strict three-phase protocol: INIT → APPEND → FINALIZE, followed by a processing poll. Each phase hits a different endpoint.
Step 1 — INIT: Reserve a Media Upload Slot
Tell X you're about to upload a video. You need to know the file size and MIME type upfront.
curl -X POST "https://api.x.com/2/media/upload/initialize" \
  -H "Authorization: Bearer {access_token}" \
  -H "Content-Type: application/json" \
  -d '{
    "media_type": "video/mp4",
    "total_bytes": 15728640,
    "media_category": "tweet_video"
  }'
Response:
{
  "id": "1234567890123456789"
}
The id is your media ID for the entire upload session. You'll use it in every subsequent call.
Note: total_bytes must be the exact file size in bytes. If it doesn't match the actual data you send, the finalize step will fail.
Step 2 — APPEND: Upload in Chunks
Now split your video into chunks and upload each one. X recommends a max chunk size of 5MB, but keep it at ~4.5MB to leave room for multipart encoding overhead.
Upload each chunk with its segment index (starting from 0):
# Chunk 0
curl -X POST "https://api.x.com/2/media/upload/1234567890123456789/append" \
  -H "Authorization: Bearer {access_token}" \
  -F "segment_index=0" \
  -F "media=@/path/to/chunk_0.bin"

# Chunk 1
curl -X POST "https://api.x.com/2/media/upload/1234567890123456789/append" \
  -H "Authorization: Bearer {access_token}" \
  -F "segment_index=1" \
  -F "media=@/path/to/chunk_1.bin"

# ...continue for all chunks
Each APPEND call returns an empty 2xx response on success.
In practice, you'll read the file in a loop, slicing off 4.5MB at a time:
file_size = 15,728,640 bytes
chunk_size = 4,718,592 bytes  (~4.5 MB)

Chunk 0: bytes 0 → 4,718,591         (segment_index=0)
Chunk 1: bytes 4,718,592 → 9,437,183 (segment_index=1)
Chunk 2: bytes 9,437,184 → 14,155,775 (segment_index=2)
Chunk 3: bytes 14,155,776 → 15,728,639 (segment_index=3, smaller last chunk)
Retry on failures: Network errors during APPEND are common — connection resets, timeouts, etc. Retry individual chunk uploads on IOException or similar transport errors. You don't need to restart the whole upload.
Step 3 — FINALIZE: Signal Upload Complete
Once all chunks are uploaded, tell X the upload is finished:
curl -X POST "https://api.x.com/2/media/upload/1234567890123456789/finalize" \
  -H "Authorization: Bearer {access_token}"
Response (immediate success — rare for video):
{
  "id": "1234567890123456789"
}
Response (processing required — typical for video):
{
  "id": "1234567890123456789",
  "processing_info": {
    "state": "pending",
    "check_after_secs": 5
  }
}
If processing_info is present, you need to poll.
Step 4 — Poll for Processing Completion
X needs time to transcode your video. Poll the media status endpoint, respecting the check_after_secs value:
curl -X GET "https://api.x.com/2/media/upload?media_id=1234567890123456789" \
  -H "Authorization: Bearer {access_token}"
Response (still processing):
{
  "id": "1234567890123456789",
  "processing_info": {
    "state": "in_progress",
    "check_after_secs": 10,
    "progress_percent": 45
  }
}
Response (complete):
{
  "id": "1234567890123456789",
  "processing_info": {
    "state": "succeeded"
  }
}
Response (failed):
{
  "id": "1234567890123456789",
  "processing_info": {
    "state": "failed",
    "error": {
      "message": "InvalidMedia: video too long"
    }
  }
}
Keep polling until state is succeeded or failed. Set a reasonable timeout — 5 minutes is a safe upper bound for most videos.
Respect check_after_secs: This is not a suggestion. X tells you how long to wait before your next poll. Polling too aggressively will get you rate-limited.
Step 5 — Create a Tweet with the Video
Once processing succeeds, attach the media to a tweet — same as with images:
curl -X POST "https://api.x.com/2/tweets" \
  -H "Authorization: Bearer {access_token}" \
  -H "Content-Type: application/json" \
  -d '{
    "text": "Check out this video!",
    "media": {
      "media_ids": ["1234567890123456789"]
    }
  }'
Multi-Image Tweets
X supports up to 4 media attachments per tweet. Upload each image separately, then include all media IDs in the tweet:
curl -X POST "https://api.x.com/2/tweets" \
  -H "Authorization: Bearer {access_token}" \
  -H "Content-Type: application/json" \
  -d '{
    "text": "A few photos from today",
    "media": {
      "media_ids": [
        "1111111111111111111",
        "2222222222222222222",
        "3333333333333333333",
        "4444444444444444444"
      ]
    }
  }'
Up to 4 media per tweet — upload each one separately and include all media IDs in the media_ids array.
Common Pitfalls
Chunk size matters — X recommends 5MB max, but multipart encoding adds overhead. Use ~4.5MB chunks to stay safely under the limit
total_bytesmust be exact — the INIT call declares how many bytes you'll send. If the actual data doesn't match, FINALIZE will failAlways poll after FINALIZE for videos — even if the finalize response looks clean, check for
processing_info. Videos almost always require processing timeRespect
check_after_secs— X tells you when to poll next. Ignore it and you'll get rate-limitedRetry APPEND on network errors — connection resets during chunk upload are common. Retry the failed chunk, not the entire upload
Refresh tokens rotate — every time you use a refresh token, the response includes a new one. The old token is dead. If you don't save the new one, your user needs to re-authorize
Basic auth for token exchange, Bearer for API calls — this hybrid confuses everyone. Token endpoints use
Authorization: Basic {base64(client_id:secret)}. All other API calls useAuthorization: Bearer {access_token}Processing can take minutes — for large videos, plan for up to 5 minutes of processing. Build async handling, not synchronous waits
Up to 4 media per tweet — upload each separately, then reference all media IDs when creating the tweet
TL;DR — The Full Flow (Diagram)
Image Upload
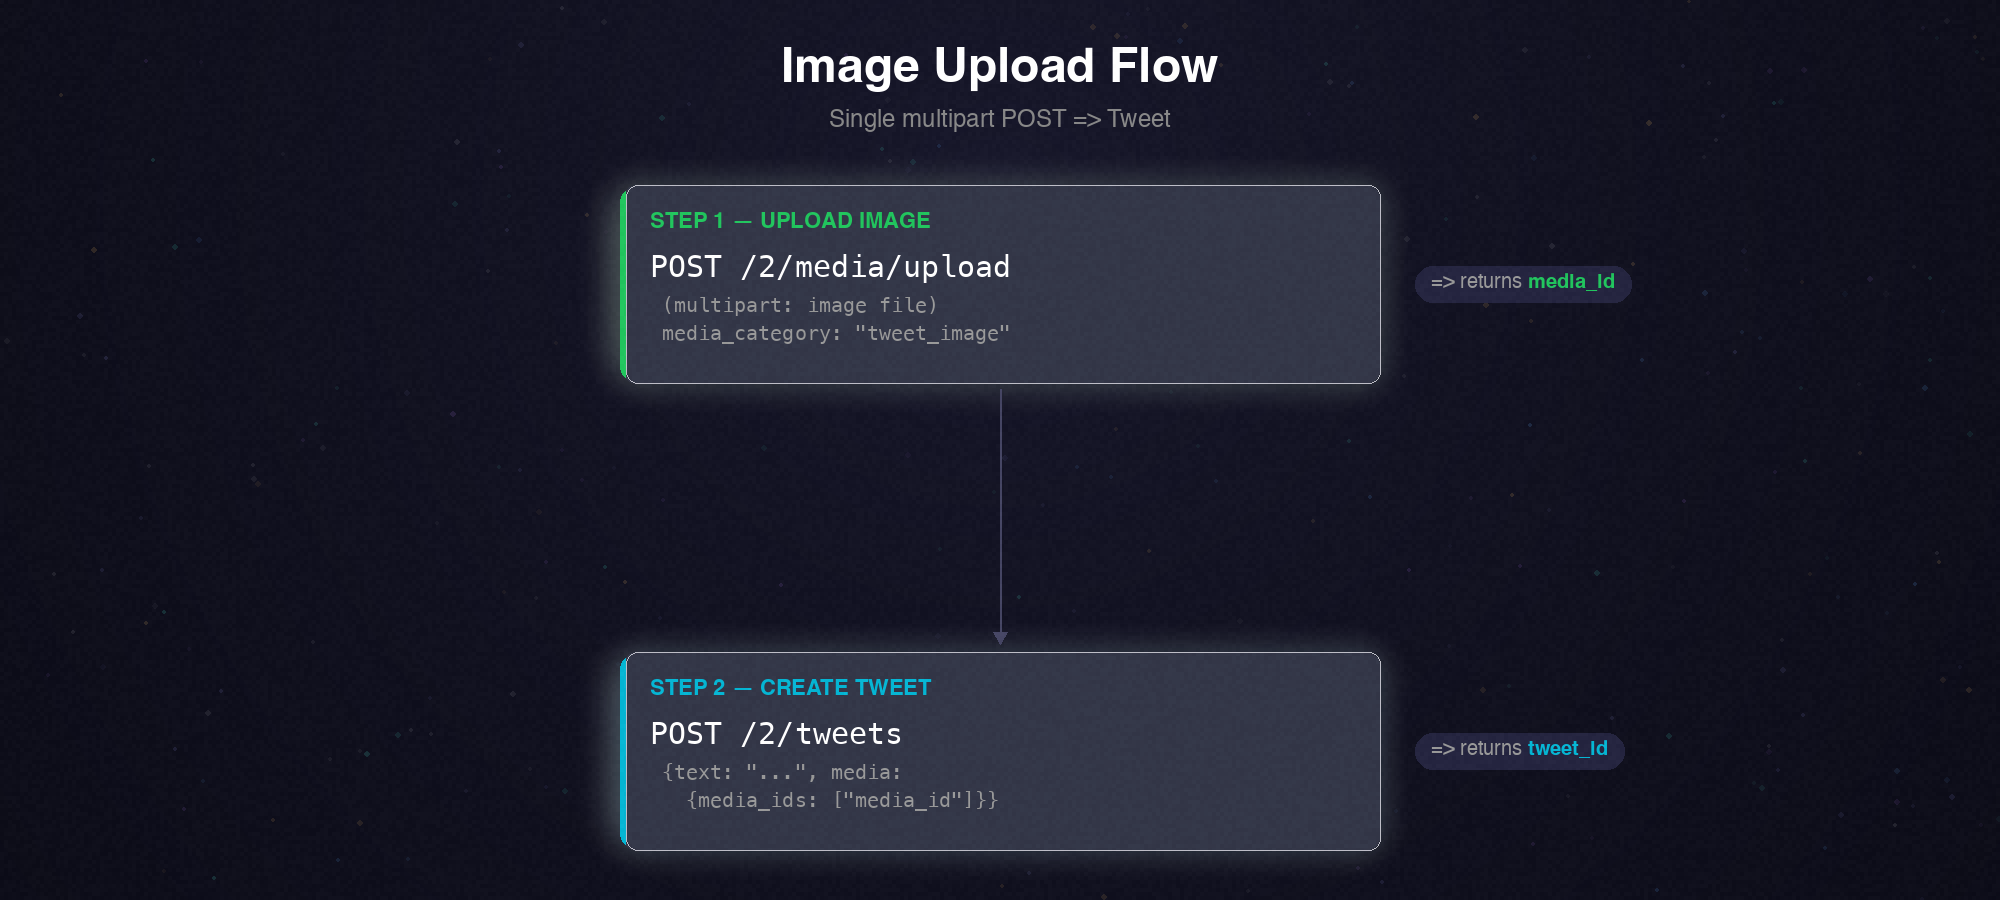 X/Twitter Image Upload Flow Diagram
Video Upload (Chunked)
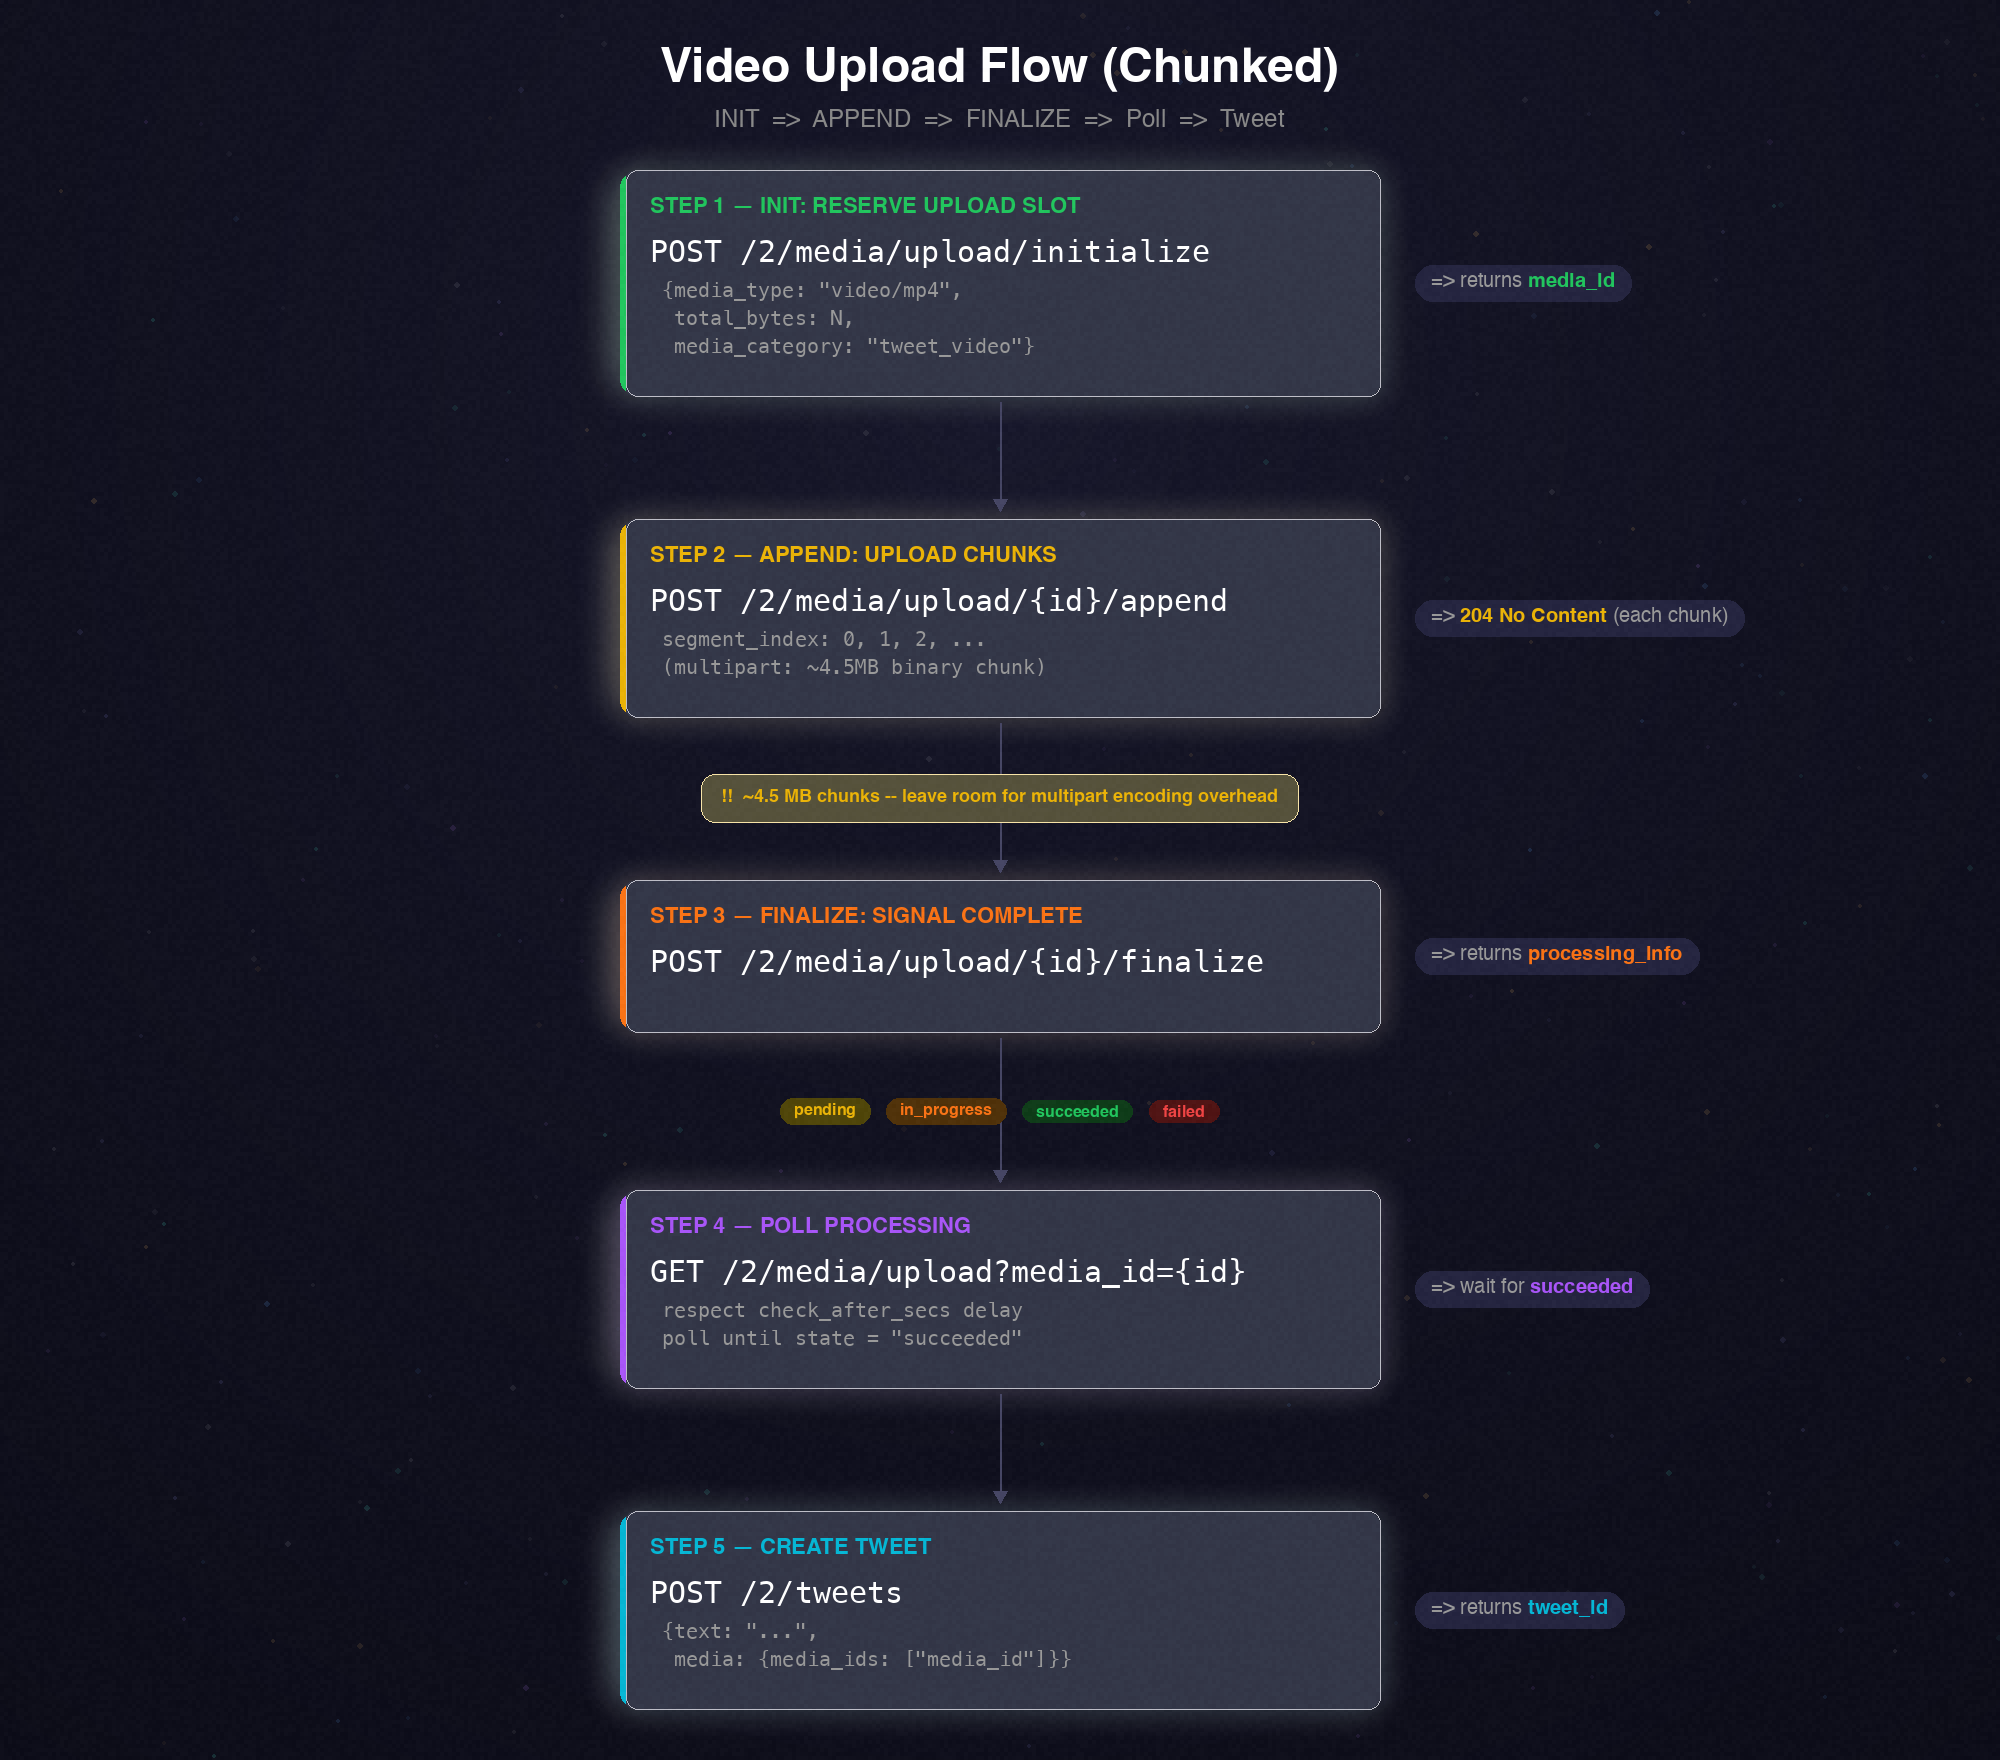 X/Twitter Video Chunked Upload Flow Diagram
About PostPulse
PostPulse handles all of this for you — chunked video uploads, processing polls, retry logic, token refresh rotation, and multi-image tweets — across X and 8 other platforms. Stop building upload plumbing and start shipping content.
About the Author

Founder of PostPulse — a social media scheduling platform for creators and teams. Software engineer with a passion for building developer tools and simplifying complex API integrations across social media platforms.